


Upgrading the Firmware
41-001343-02 REV04 – 05.2014 8-7
Enabling Auto-Resync Using the Aastra Web UI
Use the following procedure to enable auto-resync for the phones in your network.
Aastra Web UI
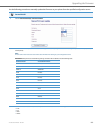
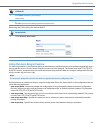
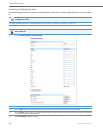
1. Click on Advanced Settings->Configuration Server->Auto-Resync.
2. In the “Mode” field, select the auto-resync mode you want to use to automatically update the phone.
Valid values are:
• None Disable auto-resync
• Configuration Files Updates the configuration files on the IP phone automatically at the specified time if the files on the server have
changed.
• Firmware Updates the firmware on the IP phone automatically at the specified time if the files on the server have changed.
• Both Updates the configuration files and firmware automatically at the specified time if the files on the server have changed.
Notes:
• If a user is accessing the Aastra Web UI, they are not informed of an auto-reboot.
• Any changes made using the Aastra Web UI or the IP phone UI are not overwritten by an auto-resync update. Auto-resync affects the con-
figuration files only. However, the settings in the Aastra Web UI take precedence over the IP phone UI and the configuration files.
• The resync time is based on the local time of the IP phone.
• If the IP phone is in use (not idle) at the time of the resync check, the reboot occurs when the phone becomes idle.
3. In the “Time (24-hour)” field, select the time that you want the update to take place.
Valid values are 00:00 to 23:30 (in 30 minute increments).
Notes:
• The resync time is based on the local time of the IP phone.
• The value of 00:00 is 12:00 A.M.
• When selecting a value for this parameter in the Aastra Web UI, the values are in 30-minute increments only.
4. In the “Maximum Delay” field, specify the maximum time, in minutes, the phone waits past the scheduled time before starting a checksync.
The range is 0 to 1439. Default is 15.
5. In the “Days” field, specify the amount of days that the phone waits between checksync operations.
The range is 0 to 364. Default is 0.
Note:
A value of 0 causes the phone to checksync every time the clock reads the proper time. A value of 1 forces the phone to wait 24 hours prior
to doing the first checksync.
6. Click Save Settings to save your settings.
These changes are not dynamic.
You must restart your IP phone for the changes to take affect.
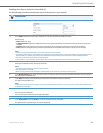
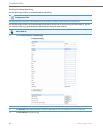
7. Click on Operation->Reset.
8. In the "Restart Phone" field click Restart to restart the IP phone and apply the update.
The update performs automatically at the time you designated.