Operational Features
41-001343-02 REV04 – 05.2014 5-159
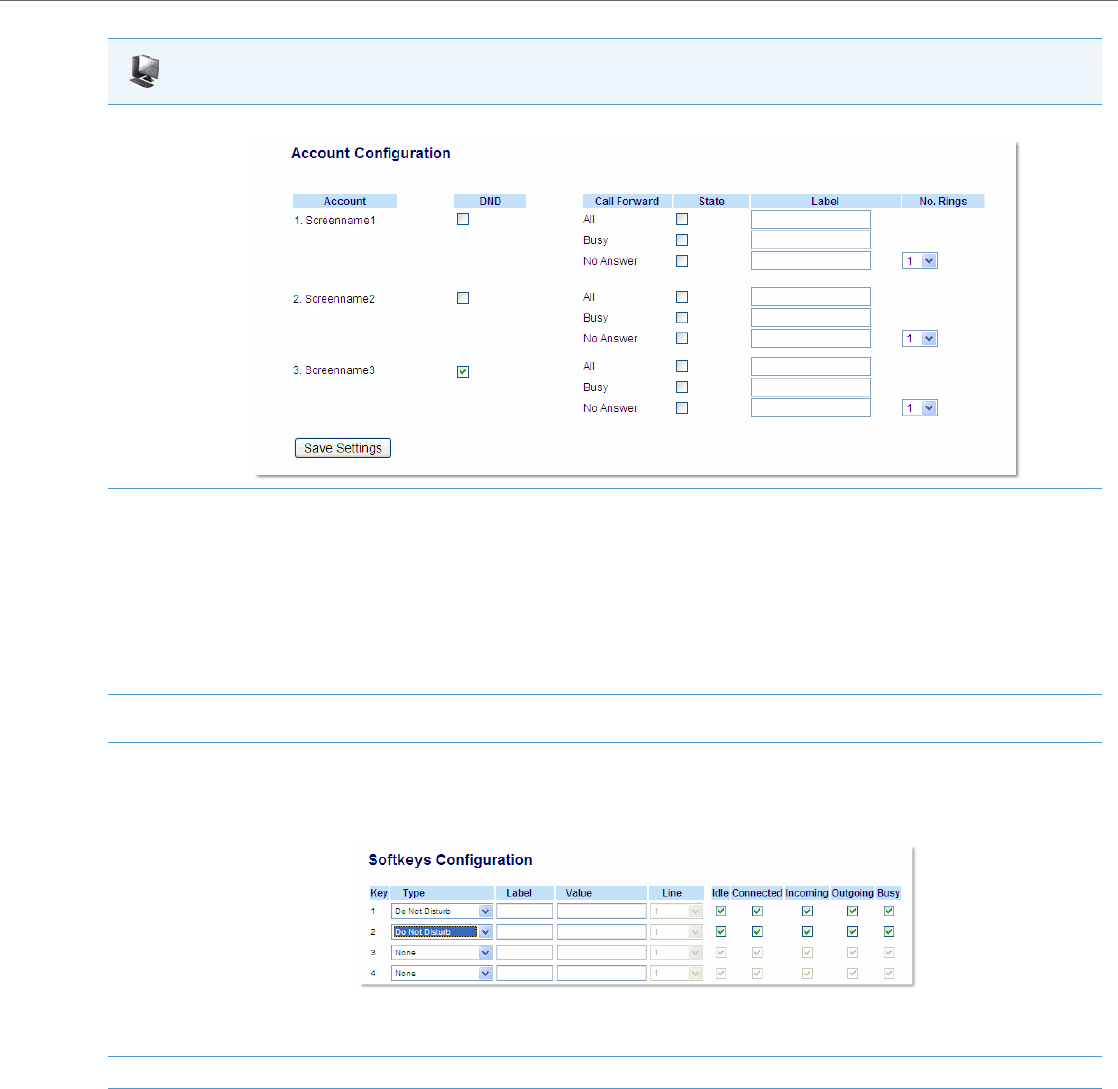
4. Click on Basic Settings->Account Configuration.
5. For each account, enable DND by placing a check mark in the box. Disable DND by unchecking the box.
Notes:
• If you selected “Account” or “Custom” mode in step 2, you can enable/disable each account or all accounts as applicable.
If you selected “Phone” mode, the first account allows you to change the DND status for all accounts.
• Number and name of accounts that display to this screen are dependant on the number and name of accounts configured on the phone.
In the screen in step 4, Screenname1 is configured on Line 1, Screenname2 is configured on Line 2, and Screenname3 is configured on Line
3. The name for the account is dependant on the name specified for the “Screen Name” parameter at the path Advanced Settings->LineN.
If you do not specify a value for the “Screen Name” parameter, the account name is based on the “Phone Number” parameter at the path
Advanced Settings->LineN. If neither the “Screen Name” nor the “Phone Number” parameters are specified, the account name shows “1”, “2”,
“3”, etc. only.
6. Click Save Settings to save your changes.
The change takes effect immediately without a reboot.
7. Click on Operation->Softkeys and XML;
or
Click on Operation->Programmable Keys;
or
Click on Operation->Expansion Module.
Note:
If there is no DND key configured or if it is removed, DND is disabled on the IP Phone.
8. Click Save Settings to save your changes.
Aastra Web UI


