Advanced Operational Features
41-001343-02 REV04 – 05.2014 6-39
Configuring DNS SRV Record Pre-caching
1. Using a text-based editing application, open the aastra.cfg file.
2. Enter the parameter, “sip dns srvX name”, where “X” is a value from 1 to 4.
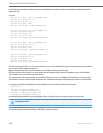
Enter a value for the DNS SRV service URI. For example:
sip dns srv1 name: _sip._udp.example.com
3. Enter the parameter, “sip dnx srvX priority, where “X” is a value from 1 to 4.
Enter a value for the DNS server priority. Valid values are 0 to 65535. Default is 0. For example:
sip dns srv1 priority: 10
After this parameter is downloaded from the configuration server to the phone, the phone uses the DNS server with the lowest numbered
priority first to perform DNS lookups.
4. Enter the parameter, “sip dnx srvX weight, where “X” is a value from 1 to 4.
Enter a value for the DNS server weight. Valid values are 0 to 65535. Default is 0. For example:
sip dns srv1 weight: 60
Note:
The “sip dns srv1 weight” parameter must be configured but will be supported in a future release.
5. Enter the parameter, “sip dnx srvX port, where “X” is a value from 1 to 4.
Enter a value for the port number on the target host. Valid values are 0 to 65535. Default is 0. For example:
sip dns srv1 port: 5060
6. Enter the parameter, “sip dnx srvX target, where “X” is a value from 1 to 4.
Enter a value for the DNS server target. Valid values are the host name or a fully qualified domain name. For example:
sip dns srv1 target: bigbox.example.com
7. Save and close the file.
8. Place the aastra.cfg file on the configuration server and download to the phones.


