


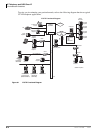

IP Telephony and QSIG Over IP
Pre-installation Guidelines
9-12 Strata CTX I&M 06/04
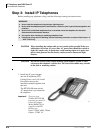
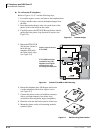
³ To wall mount IP telephones
Refer to Figures 9-5~9-7 and the following steps.
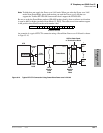
1. Loosen the captive screws, and remove the telephone base.
2. Using a suitable cutter, remove the handset hanger from
the base.
3. Insert the handset hanger in the slot on the front of the
phone. It fits in the notch on the cradle.
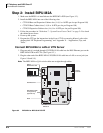
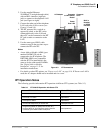
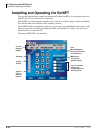
4. Carefully remove the IPT10-SUB from the base unit by
pulling back the plastic clips that hold it in place (see
Figure 9-4).
5. Rotate the IPT10-SUB
180 degrees. Secure it
back onto the
telephone PCB with
the white plastic clips
(see Figure 9-6)
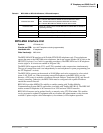
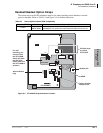
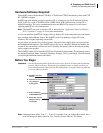
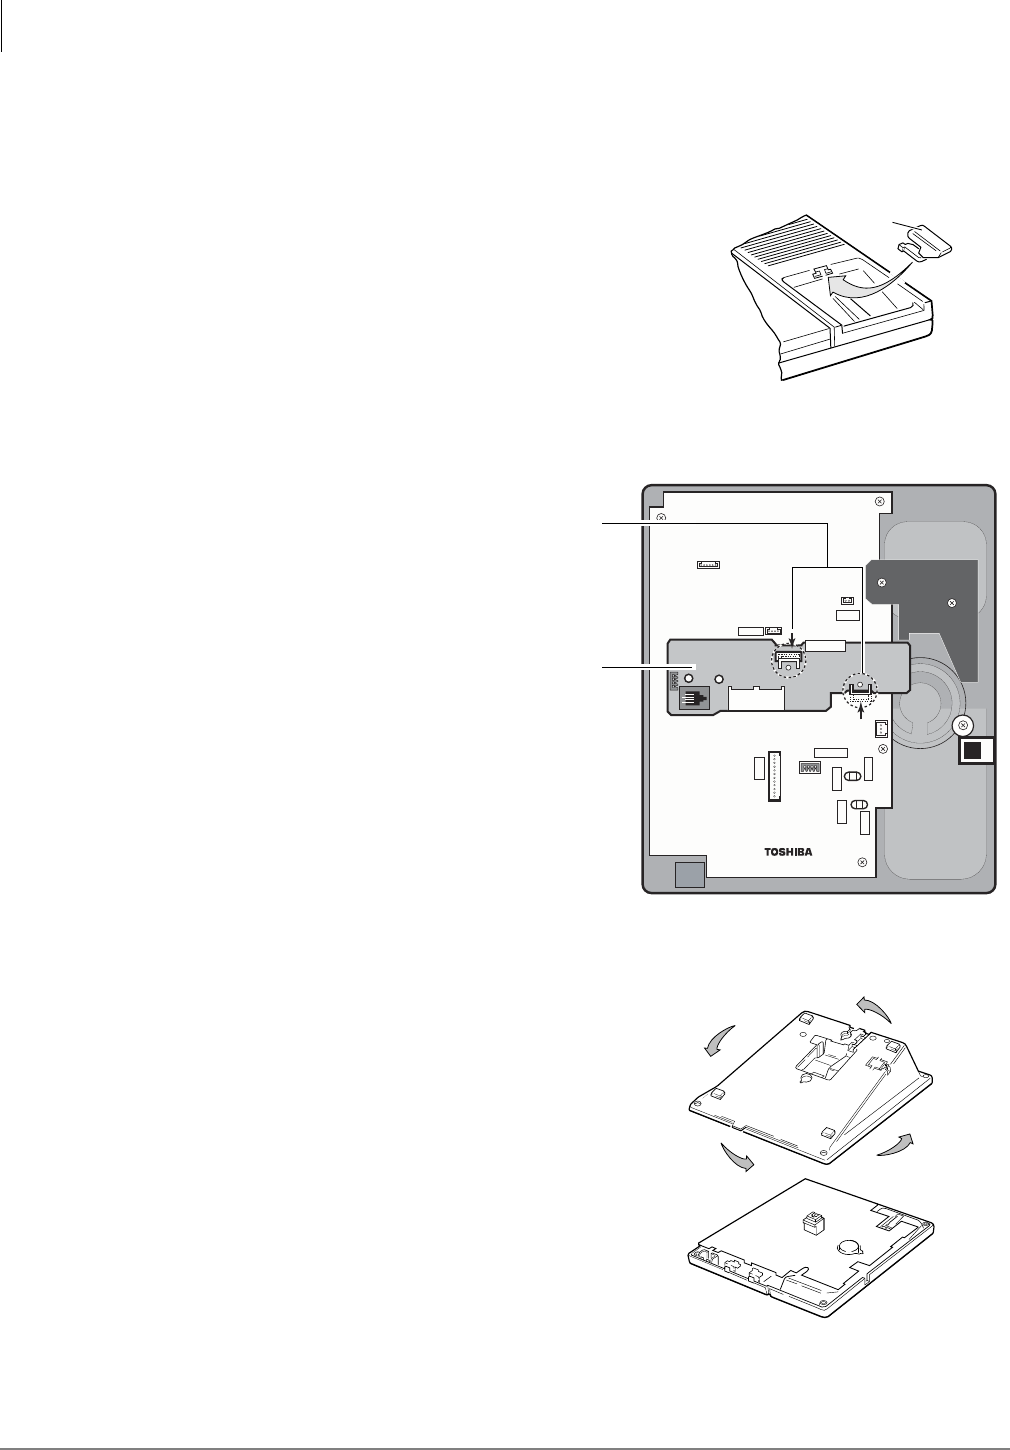
6. Rotate the telephone base 180 degrees and secure
it to the telephone with its four captive screws
(see Figure 9-7)
7. Connect the phone to the wall modular connector
with a cord approximately four inches long
(available at most telephone supply companies).
8. Route the cord into the hollow portion of the base.
9. Mount the phone on the wall mounting modular
connector plate.
Handset
Hanger
1479
Figure 9-5 Handset Hanger
6751
IPT10-20KSD
ADM
HEADSET
J502
J402
UARTO
P101
LED Port
J201
J200
W402
W403
W401
W400
CARBON
CARBON
CARBON
CARBON
IPT10-SUB
IPT10-SUB should be
turned this way (180
degrees from original
placement) for wall
mounting the telephone.
Push in clips to secure
IPT10-SUB.
Figure 9-6 Rotate IPT10-SUB for Wall Mounting
Figure 9-7 Wall Mounting Base Rotation
1480