


Strata CTX100-S/CTX100 Installation
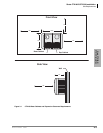
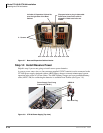
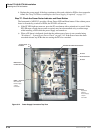
Installing the CTX100 Cabinet
Strata CTX I&M 06/04 3-11
Strata CTX100-S/
CTX100 Installation
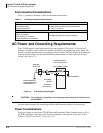
Reserve Battery Considerations
Important! Local ordinances may dictate battery type and installation details.
The batteries require a well-ventilated location within nine feet of the system (the interface cable is
nine feet long).
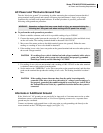
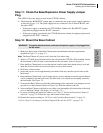
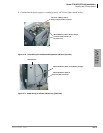
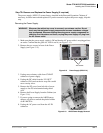
Step 6A: Install the Optional ABCS1A Battery Charger
1. Attach the ABCS1A to the inside wall of the Power Supply (see photos below). Fit the two
holes on the ABCS1A over the metal prongs of the power supply and align the two plastic tips
of the ABCS1A over the holes on the inside wall of the power supply. Snap the ABCS1A into
place. Pull on the ABCS1A to make sure that it’s securely installed.
2. Attach the ABCS1A four-wire plug onto the power supply four-prong connector (CN-501).
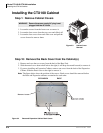
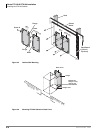
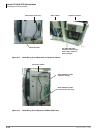
Step 6B: Install the Battery Cable
1. A black jumper wire is supplied with the ABTC-3M cable. Connect the black jumper wire from
the positive terminal of one 12VDC battery to the negative terminal of the second 12VDC
battery (see Figure 3-9).
2. Ensure that a serviceable 10-amp fuse is installed in the in-line fuse holder of the ABTC-3M
battery cable.
3. Connect the white lead of the ABTC-3M battery cable to the open positive terminal of the
12VDC battery. Connect the black lead to the open negative terminal of the second 12VDC
battery.
WARNING! To reduce the risk of fire or injury to persons, read and follow these
instructions:
³ Use only 12VDC gelcell batteries.
³ Do not dispose of the batteries in a fire. The cells may explode. Check
with local codes for possible special disposal instructions.
³ Do not open or mutilate the batteries. Released electrolyte is corrosive
and may cause damage to the eyes or skin. It may be toxic if swallowed.
³ Exercise care in handling batteries in order not to short the battery with
conduction materials such as rings, bracelets, and keys. The battery or
conductor may overheat and cause burns.
³ Charge the batteries provided with or identified for use with this product
only in accordance with the instructions and limitations specified in this
manual.
³ Observe proper polarity orientation between the batteries and battery
charger.
WARNING! Whenever the cabinet top cover is removed, use extreme caution. Do not
touch any internal power supply components because hazardous voltages
may be exposed. Whenever adding/removing power supply components or
checking circuit breakers and fuses, unplug the power supply AC plug from
the AC source outlet.