


Chapter 9 Replace or Upgrade a Power Supply 199
Installation and Maintenance Guide
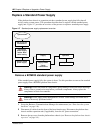
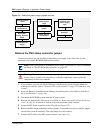
Remove a BCM400 standard power supply
Use this procedure to remove the standard power supply from a BCM400 platform base chassis.
1 Set up the Business Communications Manager for maintenance (see “Shut down the system
hardware” on page 146).
2 Disconnect all cables from the front of the base function tray.
3 Disconnect the platform base chassis and the expansion unit (if applicable), from the AC
power connection.
4 Remove the top cover from the platform base chassis (see “Remove the platform base chassis
top cover” on page 161).
5 Attach one end of the grounding strap to your wrist and the other end to a grounded metal
surface.
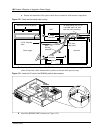
6 Disconnect all cables from the I/O card.
7 Locate and disconnect the power supply cables from the media bay backplane and hard disk.
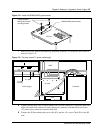
8 Partially remove the base function tray (see “Remove the base function tray” on page 150).
Continue to the next step of this procedure when complete.
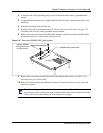
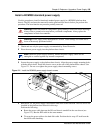
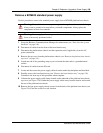
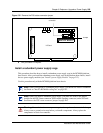
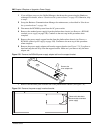
9 Unfasten the power supply cable clamp located on the underside of the platform base chassis
top cover (see Figure 126). Gather the power supply cables away from the interior and toward
the rear of the platform base chassis.
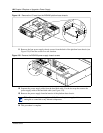
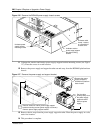
10 Remove the four power supply chassis screws from the back of the platform base chassis (see
Figure 126). Place the screws in a safe location.
Warning: Protect the hardware components against damage from electrostatic discharge.
Always wear a ground wrist strap before you handle components. Always place the
components in static-free container.
Warning: Power supply cable management is critical. Cable damage can result due to
loose or incorrectly positioned cables.