


Chapter 7 Hard Disk Replacement Procedures 169
Installation and Maintenance Guide
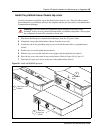
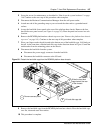
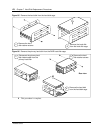
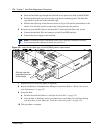
Figure 94 Detach the hard disk cage from the BCM400 advanced function tray chassis
11 Remove the hard disk cage from the BCM400 advanced function tray chassis. Place the hard
disk cage on a flat, clean and static-free surface.
12 This procedure is complete.
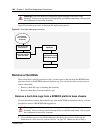
Remove a hard disk from the hard disk cage
Use this procedure to remove the hard disk from the hard disk cage. Use this procedure also to
remove hard disks from a BCM200 or BCM400 RAID upgrade unit.
1 Remove the hard disk cage from the chassis (see “Remove a Hard Disk” on page 166).
Continue to the next step in this procedure when complete.
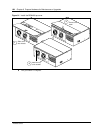
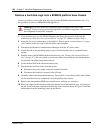
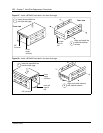
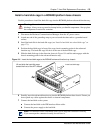
2 Unscrew the hard disk retainer screws from both sides of the hard disk cage. Place the retainer
screws in a safe location (see Figure 95).
3 Remove the hard disk from the hard disk cage. Place the hard disk on a flat, clean and
static-free surface.
Warning: Protect the hardware components against damage from electro-static
discharge. Always wear a ground wriststrap before you handle components. Always place
the components in static-free container.
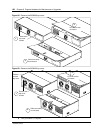
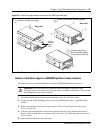
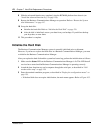
Lift hard disk cage tab
1
2
Slide the hard disk cage toward
the rear of the advanced function
tray chassis