


Schedule distribution 535
To filter information in the schedule details pane
1. On the schedule details pane, click the arrow on a column header.
2. Select the filter criteria.
Synchronizing views
You can synchronize the people pane, time bar pane, and totals pane with the order of the information in the
schedule details pane. Once you have organized the details of your schedules (sorting, filtering, and
grouping) in the schedule details pane, synchronize views to reflect the order you have selected. For
information on how to sort, filter, or group schedule details, see “Viewing schedule details” on page 534.
To synchronize views
1. Click the View tab.
2. Select the Synchronize time bar view with details view check box.
3. Optionally, select the Vertical scrolling check box.
Running schedule reports
The Workforce Scheduling reports are produced in Microsoft Excel format. You must run and print the
following Workforce Scheduling reports from Contact Center Management. See the Mitel Contact Center
Solutions Enterprise Edition Reports Guide for more information.
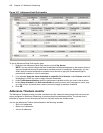
You can produce on-demand reports and scheduled reports for the following reports:
• Detailed Schedule by Employee with Totals
• Schedule by Employee by Time Off by Day of Week
• Employee Configuration
• Summary Schedule by Employee
• Totals Pane
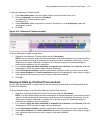
Running on-demand reports
To run an on-demand report
1. In Contact Center Management, click Reporter=>Workforce Scheduling=>Schedules.
2. Under Report type, select a report.
3. Under Schedule, select a schedule.
4. Under Employee, select an employee.
5. Under Start date, select the start date of the report.
6. Under End date, select the end date of the report.
7. Optionally, click the Filter tab and specify the report filters options for the Workforce Scheduling
report.
8. Click the Advanced tab.
9. If you want to create a separate report for each day in the selected date range, select the Create one
report for each day in the selected date range check box.
10. After Report output language, select the language for the report.
11. After Reader type, select either Excel or PDF.
12. If you want to email the report, under Excel distribution, select the Email the report to check box
and specify the contact group, contact, and/or email address.
13. If you want to print the report, select the Print the report check box.
14. If you want to include charts with the printed report, select the Include charts when printing check
box.
15. Click Submit.