


Business hour schedules 171
Business hour schedules
You create schedules that accurately reflect the business hours of your operation. You can create yearly or
seasonal schedules. When you install Contact Center Management, the 24/7 default schedule is created. This
schedule is for businesses that operate 24 hours a day, seven days a week.
Your contact center software performs certain tasks during business hours and other tasks after business
hours. For example, Multimedia Contact Center sends business hour auto-acknowledgement messages to
customers who contact you by email or chat during your business hours, and sends outside business hour
auto-acknowledgement messages to customers who contact you by email or chat after your business closes
for the day. You create schedules so that Contact Center Management knows what the hours of operation are
for your business.
You create schedules for the SX-200 and SX-2000 media servers in the Contact Center Management
website, under YourSite=>Schedule. We recommend you create schedules for 3300 ICP media servers in
YourSite Explorer=>Schedules. You must create schedules for 5000 and Axxess media servers in YourSite
Explorer=>Schedules.
Creating schedules
The schedules you create do not expire. The weekly schedule configuration applies week after week until you
change the schedule or apply a different schedule to the device. You can exclude specific dates from the
schedule for national holidays.
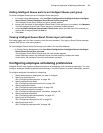
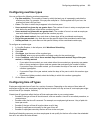
To create a schedule in YourSite Explorer
1. In YourSite Explorer, click Schedules.
2. Click Add.
3. After Name, type the name of the schedule (for example, type Fall 2008 schedule).
4. After Schedule exclusion list, click ... and select a schedule exclusion list.
5. If you must create or modify an exclusion list for the schedule, click Manage schedule exclusion list
and configure a list of days to exclude from the schedule.
See “Managing schedule exclusion lists” on page 172.
6. After Start time, select the business day start time for each day of the week.
7. After End time, select the business day end time for each day of the week.
8. After Disable for day, enable the check box for each day your business is closed.
9. Click Save.
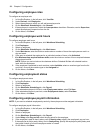
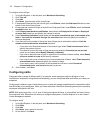
To create a schedule in the Contact Center Management website
1. In Contact Center Management, click YourSite=>Schedule.
2. Click Add.
The Add a schedule window opens
3. After Name, type the name of the schedule (for example, type Fall 2007 schedule).
4. After Schedule exclusion list, select a list.
5. If you must create or modify an exclusion list for the schedule, click Manage schedule exclusion list
and configure a list.
See “Managing schedule exclusion lists” on page 172.
6. After Start time, select the business day start time for each day of the week.
7. After End time, select the business day end time for each day of the week.
8. After Disable for day, select the check box for each day your business is closed.
9. Click Save.