


Before installing Workforce Scheduling 501
Workforce Scheduling
Workforce Scheduling is an optional application that works in conjunction with Contact Center Management
and the Mitel 3300 ICP, SX-200 ICP, SX-2000, 5000 CP, and Axxess. You configure employees in YourSite
Explorer and schedule them with Workforce Scheduling. Using historical data from Contact Center
Management, Workforce Scheduling forecasts the number of employees required to meet your contact
center's Service Level objectives. Using Workforce Scheduling, you can build schedules with forecast
information. If you enter employee payroll information in Contact Center Management, Workforce Scheduling
can use this information for scheduling and budgeting purposes.
To install Workforce Scheduling, select the Workforce Scheduling option in Client Role Selector
(Start=>Programs=>Mitel =>Client Role Selector).
NOTE: In order to access Workforce Scheduling, you require the May manage Workforce Scheduling security
role. For more information on configuring security roles, see “Creating and applying security roles” on
page 173.
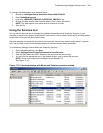
Using Workforce Scheduling in conjunction with Contact Center Management, you can
• Customize schedules
• Forecast scheduling requirements
• Match an employee’s skills to those skills required for jobs in each schedule
• View the distribution of employees across each schedule
• Print schedule reports
There are two optional applications that work in conjunction with Workforce Scheduling: Schedule Adherence
and Employee Portal. For more information on these applications, see “Schedule Adherence” on page 537
and “Employee Portal” on page 542.
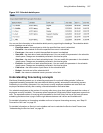
Before installing Workforce Scheduling
Before you install and run Workforce Scheduling or view Schedule Adherence monitors in Contact Center
Client, you must enable remote SQL Server connections and grant SQL Server permissions to Workforce
Scheduling users.
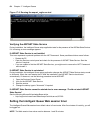
Enabling remote SQL Server connections
To enable remote SQL Server 2005 connections
1. On the Enterprise Server, click Start=>All Programs=>Microsoft SQL Server
2005=>Configuration Tools=> SQL Server Surface Area Configuration.
2. Under Configure Surface Area for localhost, click Surface Area Configuration for Services and
Connections.
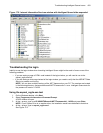
3. Expand the <SQL Server name> tree to Database Engine and select Remote Connections.
4. Select Local and remote connections.
5. Select Using both TCP/IP and named pipes.
6. Expand the SQL Server Browser tree and select Service.
7. After Startup type, select Automatic.
8. Click Apply.
9. Click Start.
10. Click OK.