


Scheduled Reports 267
5. If you are generating an event by period report, after Interval, select the time interval for reporting.
6. After Report mode, select either Default or Over midnight.
7. After Days to include, select the days of the week to include in the report (for example, if you select
a date range of September 1 to 30, and select Wednesday and Friday as the days to include, you will
produce a report for the Wednesdays and Fridays that fall between September 1 and September 30).
8. Click the Advanced tab.
9. After Report Output language, select a language.
10. Click Submit.
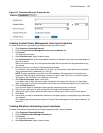
Adding work schedules to Workforce Scheduling Schedules
To add work schedules to a Workforce Scheduling Schedule
1. On the Manage schedule window, click Add report.
2. Click Workforce Scheduling=>Workforce Scheduling Schedule reports.
3. Under Report type, select the work schedule you want to add to the schedule.
4. Click the Advanced tab.
5. After Report Output language, select a language.
6. Click Submit.
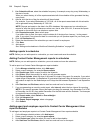
Generating scheduled reports immediately
If you want to generate your scheduled reports at a specific time (other than immediately), you specify the
date and time they will be generated when you create the schedule. See “Creating report schedules” on
page 263.
To generate scheduled reports immediately
1. Click Reporter=>Scheduled Reports.
2. After Select a schedule, select the schedule you want to generate.
3. Click Execute schedule now.
The Execute schedule now window opens.
4. In the Start date and End date calendars, select start and end dates for the report.
5. Click Submit.
The reports associated with the schedule are generated immediately and placed in your Report
Inbox.
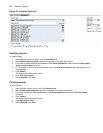
Report Inbox
The Report Inbox application displays the on-demand, scheduled, and forecast reports generated under your
user name over the past 30 days. Inbox manager deletes reports from your inbox by date range.
NOTE:
• In Report Inbox, if the report status is Pending for an extended period of time, start Client Component
Pack Manager and confirm the Enterprise Server IP address and your user name and password are
correct.
• In Report Inbox, if Data Limit Exceeded opens, re-generate the report using a shorter time span.
Report Inbox includes
• Today’s reports displays all of the reports generated today under your user name.
• Yesterday’s reports displays all of the reports generated yesterday under your user name.
• All of your reports displays all of the reports generated under your user name over the last 30 days.
• Inbox Manager deletes reports from your inbox by date range.