Chapter 7 SIP Server
X6004 User’s Guide
99
7.4 Call Blocking
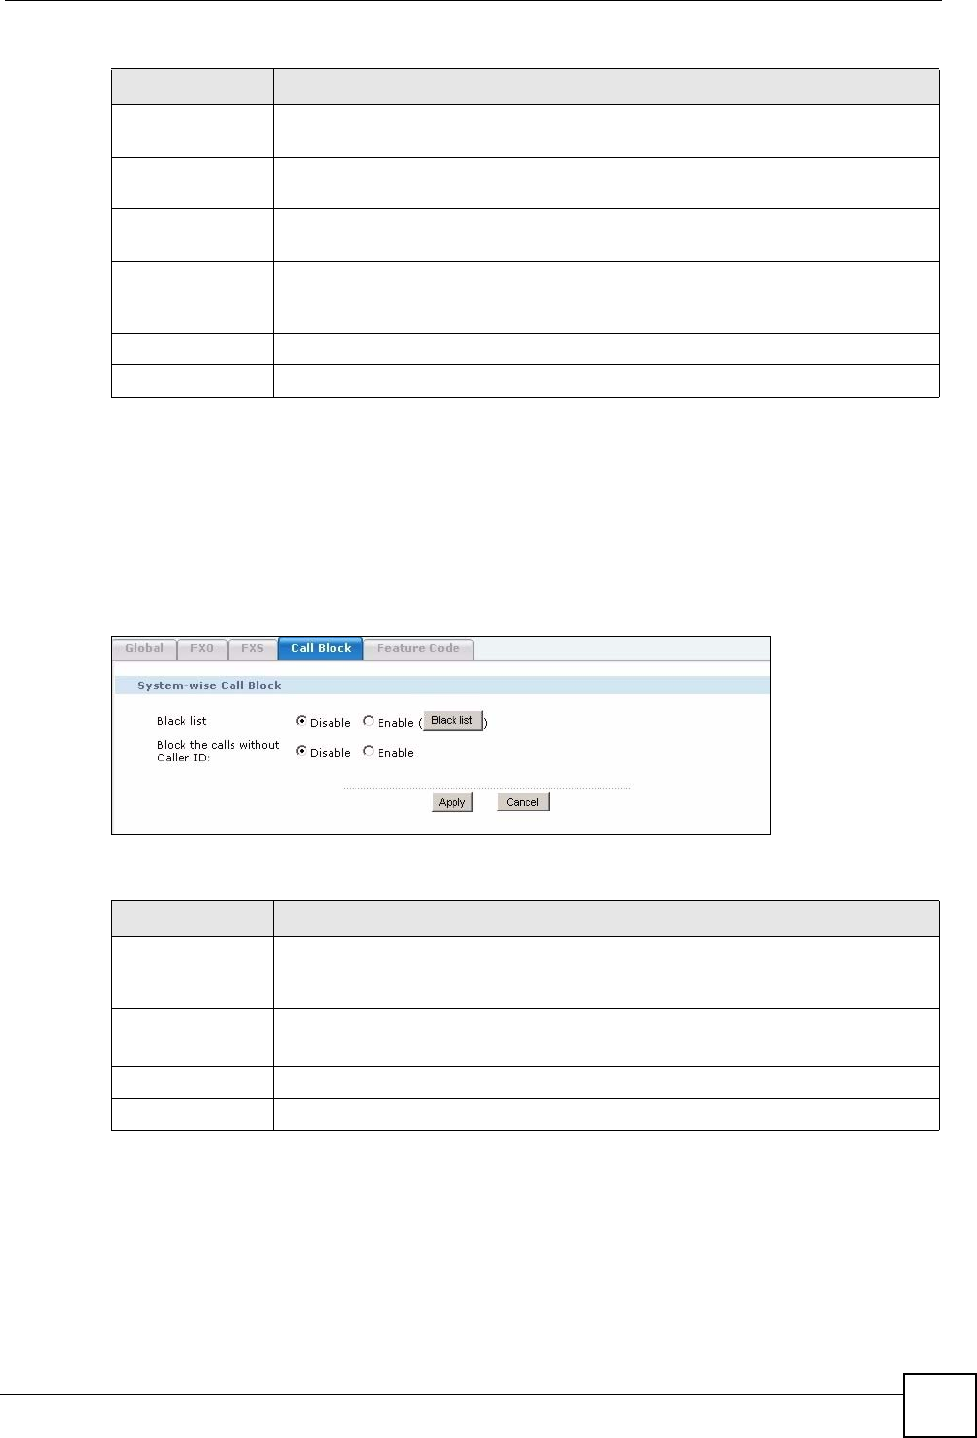
Use this screen to have the X6004 not accept incoming calls from specific phone numbers or
calls without caller ID. Click Configuration > PBX > Server Configuration > SIP Server >
Call Block to view the screen as shown next.
Figure 86 Configuration > PBX > Server Configuration > SIP Server > Call Block
Each field is described in the following table.
7.4.1 Call Blacklist
Use this screen to set up a list of phone numbers that are not allowed to call into the X6004.
Speaking Volume Select the volume level transmitted by the X6004 from the analog phones
connected to the X6004. -6 is the quietest, and 6 is the loudest.
Listening Volume
Select the volume level sent by the X6004 to the analog phones connected to the
X6004. -6 is the quietest, and 6 is the loudest.
Dial Interval
Enter the number of seconds the X6004 should wait after you stop dialing
numbers (from FXS extensions) before it makes the phone call.
Country Code
The signals used by telephone companies to indicate a busy line or an available
line differ by country. You must select the country code for the location of the
X6004. The X6004 can then detect whether the FXS line is in use or available.
Apply
Click this to save your changes.
Reset Click this to set every field in this screen to its last-saved value.
Table 20 Configuration > PBX > Server Configuration > SIP Server > FXS
LABEL DESCRIPTION
Table 21 Configuration > PBX > Server Configuration > SIP Server > Call Block
LABEL DESCRIPTION
Black list Select Disable to turn call blocking off on the X6004. Select Enable to turn on call
blocking on the X6004. Click Black list to configure the phone numbers you want
to block from calling into the X6004. See Section 7.4.1 on page 99.
Block the calls
without Caller ID:
Select Disable to allow incoming calls without caller ID to be routed by the X6004.
Select Enable to block calls without caller ID from being routed by the X6004.
Apply
Click this to save your changes.
Cancel
Click this to set every field in this screen to its last-saved value.
