


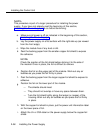


Installing the Control Unit
NOTE:
This procedure is part of a larger procedure for installing the power
supply. If you have not already read the beginning of this section,
“Installing the Power Supply,” do so before continuing.
a.
b.
c.
d.
e.
f.
g.
h
i.
2-38
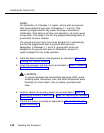
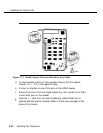
Make sure all power is off as indicated in the beginning of this section,
“Installing the Power Supply.”
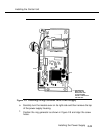
Lay the power supply on a flat surface with the right side up (as viewed
from the front edge).
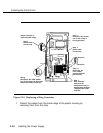
Wipe the module free of any dust or dirt.
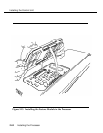
Peel the backing paper from the smaller copper-foil shield to expose
the adhesive.
NOTE:
Check the position of the foil shield before sticking it to the side of
the module. Once in place, the foil is difficult to remove.
Position the foil on the upper part of the module. Work out any air
bubbles as you press the foil firmly in place.
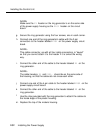
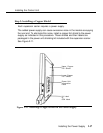
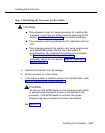
Peel the backing paper from the larger copper-foil shield to expose its
adhesive.
Position the foil on the lower part of the module.
— The shields should meet.
— They should not overlap or have any space between them.
— Tuck the foil shield tightly along the ledge (or crease) of the
housing. Work out any air bubbles as you press the foil firmly
in place.
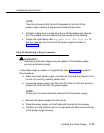
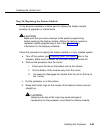
With the copper-foil shield in place, put the power unit information label
on the lower piece of foil.
Attach the UL or CSA label on the power supply below the copper-foil
shield.
Installing the Power Supply