2-107
1
Before Using the Products
2
Preparation
3
Connection
4
Setup
5
Adjustment
6
When in Trouble
7
Supplement
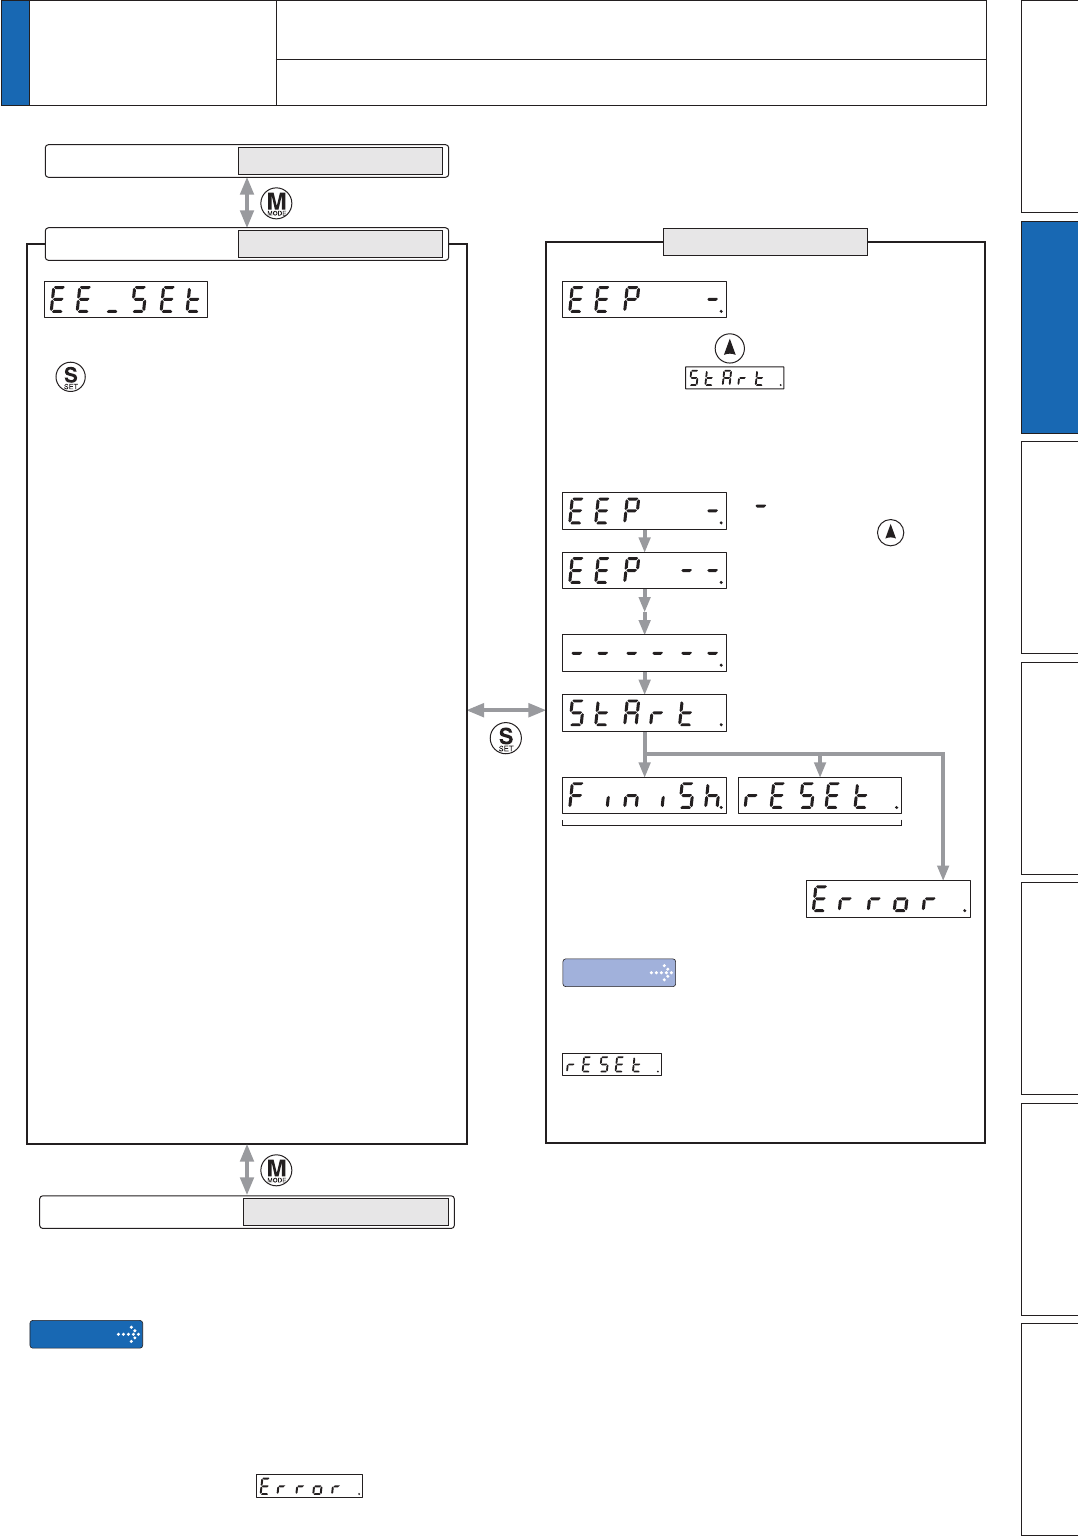
(SET button)
“ ” increases while
keep pressing (for
approx. 5sec) as the
right fig. shows.
When you change the parameters which
contents become valid after resetting,
will be displayed after finishing
wiring. Turn off the control power once to
reset.
.HHSSUHVVLQJXQWLOWKHGLVSOD\
changes to when you
execute writing.
* “Start” flashes instantaneously and is
difficult to check visually.
7RZULWHWKHSDUDPHWHUWR((3520SUHVV
WRFKDQJHWR(;(&87,21GLVSOD\
0RGHVZLWFKEXWWRQ
0RGHVZLWFKEXWWRQ
Writing completes
Writing error
Starts writing.
SELECTION display
EEPROM Writing Mode
SELECTION display
Parameter Setup Mode
SELECTION display
Auxiliary Function Mode
EXECUTION display
Note
Caution
1. When writing error occurs, make writing again. If the writing error repeats many times,
this might be a failure.
2. Don't turn off the power during EEPROM writing. Incorrect data might be written. If this
happens, set up all of parameters again, and re-write after checking the data.
:KHQWKHHUURUGHÀQHGE\(UU´8QGHUYROWDJHSURWHFWLRQRIFRQWUROSRZHUVXSSO\µ
occurs,
is displayed indicating that no writing is made to EEPROM.
2
Preparation
15. How to Use the Front Panel
EEPROM Writing Mode


