


Initial Programming
Automated Attendant Service
Before you begin, locate Forms 1, 3, 3A, 4, and 5 for the voice messaging
system. If the system is set for Bilingual Mode, also locate Forms 3B, 4A, and
5A. If Automated Attendant Service is not to be used; skip to “Voice Mail
Service.” Otherwise, to program Automated Attendant Service:
■
■
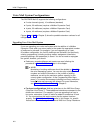
If the system is set for Monolingual Mode, use the procedures below.
If the system is set for Bilingual Mode, use the procedures later in this
chapter.
Monolingual Mode
Menu Definition, Day Menu Prompt, and Announcements
To define the Automated Attendant Service menu as specified on Form 3 and to
record the Day Menu Prompt specified on Form 4 and Automated Attendant
Announcement(s) specified on Form 3A, follow this procedure.
It is important to understand that you must approve each element (that is, the
Menu Definition, the Day Menu Prompt, and any Announcements, as well as
save all of these entries (in Step 15). If you exit at any point before saving
your approved entries, your entries will be lost. This procedure is designed
to ensure that callers do not hear the incomplete menu while you are in the
process of building/modifying it.
1.
2.
3.
4.
5.
6.
7.
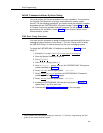
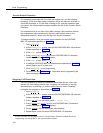
If necessary, access the Programming Main Menu. If you are already at
the Programming Main Menu, skip to Step 2.
a.
b.
c.
d.
Press [
Intercom
] [
7
] [
7
] [
7
] or the programmed VMMsgs button.
Press [
9
] [
9
] [
#
].
Enter the Mailbox Password and press [ # ].
Press [
9
].
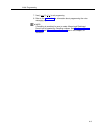
Press [
3
] for Automated Attendant.
Press [
1
] for Day Menu.
Press [ 6 ] to modify the Menu Definition and/or Day Menu Prompt.
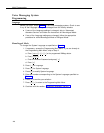
Enter a Selector Code for which information is specified in Column C of
Form 3. If Column C is empty, skip to Step 10.
Press [
9 ] to confirm that you are modifying this Selector Code action.
Do one of the following:
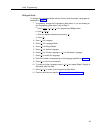
—
Press [
1
] for Selector Code Transfer.
—
—
Press [
3
] for Announcement.
Press [
5
] for Direct Extension Transfer (factory-default setting).
4-8