Chapter 17 Replacing the hard disk 231
Installation and Maintenance Guide
b Next you need to ensure the correct MSC configuration has been entered.
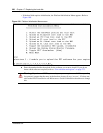
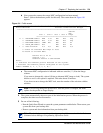
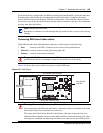
Enter 1 (Select the hardware profile for this unit). The screen shown in Figure 101
appears.
Figure 101 Profile screen
c The current MSC configuration is indicated with two asterisks (**) Note the Image
column.
If you want to change this, select 6 (Select an alternate MSC image to load). The system
checks to see if a core upload is required. This takes about 45 minutes.
If you do not want to change the MSC load, enter the number of the selection with the
asterisks.
4 The system automatically reboots as part of the initialization process. When the process is
complete, the telnet session disconnects.
5 Do one of the following:
• Run the Quick Start Wizard to create the system parameters and defaults. Then restore your
system data from your backup disk.
• Restore system and data information from your backup disk.
Note: You can only change the profile once. After the profile is changed, the menu
options for the profile no longer display.
Note: The detailed processes for performing steps 4 and 5 are contained in the Business
Communications Manager Programming Operations Guide.
=============================================================================
Nortel Networks Business Communications Manager
=============================================================================
Default
MSC
Slot 1 Slot 2 Slot 3 Slot 4 Image
=============================================
** 1. -BCM-WVMN-CONFIG WAN V.90 MSC NIC ETQ
2. -BCM=NVMN-CONFIG NIC V.90 MSC NIC ETQ
3. =BCM-INMN-CONFIG IWAN NIC MSC NIC E1
4. -BCM-N_MN-CONFIG NIC MSC NIC E1
* 5. -Base Platform n/a n/a MSC NIC n/a
6. Select an alternate MSC image to load.
M. Return to the Main Menu.
BCM Rls ID 2.5 RC 10
Version 7.1.8
Hardware Profile 2 CORE UPLOAD
Notes:
** Indicates the hardware profile detected on this system.
* Indicates the hardware profile configured on this system.
PRESS a NUMBER (1, 2, 3, 4, 5, 6, M) ?


