


100
6.
Press
ENTER
to store the new name. (Or
CANCEL
to cancel any changes and leave the original file
name.)
Configuring fields
If you do not want to change the number of entry fields,
skip steps 1-6 below.
1.
Press
TEL
or
USER FILE
to open the application
that you want to set up the fields in.
2.
Press
MENU
, select one of the three CONFIGURE
menus corresponding to the file you wish to modify,
then press
ENTER
.
The CONFIGURE submenu appears.
3.
Highlight FILE NAME and press
ENTER
.
The FILE NAME window opens.
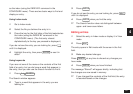
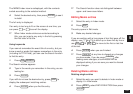
#4-2-3 Display
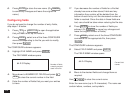
4.
Move down to NUMBER OF FIELDS and press
NEW
to clear the current number in the field.
5.
Enter the number of fields that you want your entries
to have.
☞ If you decrease the number of fields for a file that
already has some entries stored, fields and any
information they contain will be deleted from the
bottom of each entry until the decreased number of
fields is reached. Since the data in these fields are
lost, care should be taken when reducing the file size.
6.
Press
ENTER
to store the number of fields you
entered. (Or
CANCEL
to cancel any changes and
leave the original number of fields.)
7.
Press
MENU
, select one of the three CONFIGURE
commands for the appropriate file, then press
ENTER
.
The CONFIGURE submenu appears.
8.
Select FIELD NAME and press
ENTER
.
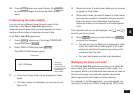
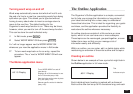
The FIELD NAME window opens.
#4-2-4 Display
9.
Move to the desired fields and change them as
required.
Use
NEW
to clear the current name.
Enter the new name (up to 12 characters). The name can
contain letters, numbers, and symbols.
Number of fields
currently set and
used in this file.
Current field
names