


98
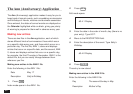
Deleting file entries
Deleting single entries
1.
Select the entry you want to delete in Index mode, or
display it in View mode.
2.
Press
MENU
, highlight DATA DELETION then press
ENTER
.
3.
Highlight SELECTED ENTRY then press
ENTER
.
A warning message will appear asking if you are sure you
want to delete the entry.
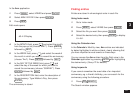
4.
Press
Y
(or
N
to cancel the deletion).
You can also delete single entries by highlighting the
entry in Index mode and pressing
DEL
.
Deleting all entries
1.
Press
MENU
, select VIEWS then press
ENTER
.
2.
Select the file in which you want to delete all the
entries then press
ENTER
.
3.
Press
MENU
, highlight DATA DELETION, then
press
ENTER
.
4.
From the submenu, highlight ALL IN SELECTED
FILE, then press
ENTER
.
A warning message will appear asking if you are sure you
want to delete all entries in the selected file.
5.
Press
Y
(or
N
to cancel the deletion).
Deleting all entries in all files
1.
Press
MENU
, highlight DATA DELETION, then
press
ENTER
.
2.
From the submenu, highlight ALL TEL FILES or ALL
USER FILES then press
ENTER
.
A warning message will appear asking if you are sure you
want to delete all entries in the files.
3.
Press
Y
(or
N
to cancel the deletion).
☞ It is not possible to delete all entries either in a single
file or in all three files simultaneously if the Organizer
is locked. See p.186.
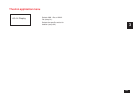
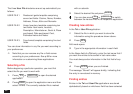
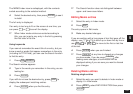
The Tel application menu
#4-1-1 Display
The User File application menu
#4-1-2 Display
Selects TEL 1, TEL 2 or TEL 3
files (see p.96).
Defines the field, index and sorting
format for each file (see p.99).
Selects the specific entries for
deletion (see p.98).
Selects USER FILE 1, USER FILE
2 or USER FILE 3 (see p.96).
Defines the field, index and sorting
format for each file (see p.99).
Selects the specific entries for
deletion (see p.98).