


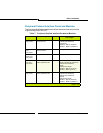
67
Basic Installation
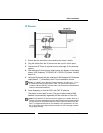
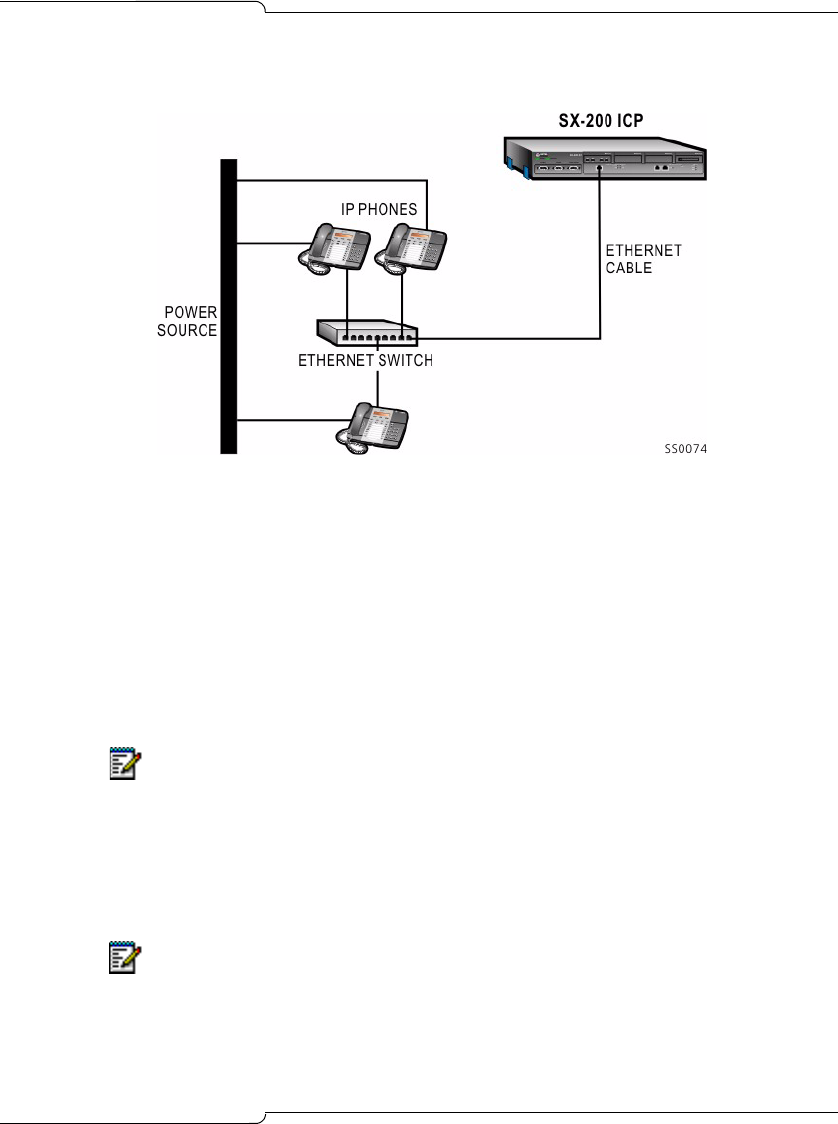
IP Phones
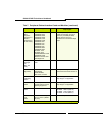
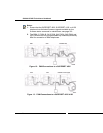
1. Ensure that the controller is connected to the Layer 2 switch.
2. Plug the cables from the IP phones into the Layer 2 switch ports.
3. Connect the IP Phone to a power source; see page 34 for powering
options.
4. Wait while the IP phone boots. After booting, the display on the phone
shows “USE Superkey TO SEND PIN.” On 5201 IP phones, the MW
lamp is lit.
5. Using the IP phone's dial pad, enter the IP Set Registration PIN access
code (default, ***) followed by the IP Phone extension number.
6. Press Superkey (or Hold for 5201 and 5207 IP phones).
The phone is now ready for use. (The type of phone and its MAC
address is automatically registered with the controller in Form 09).
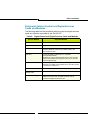
Note: You MUST use a default IP Phone extension number (102 - 117) or
a number previously programmed in CDE. You cannot use extension
numbers 198 and 199; they are reserved for the Console and Subattendant
station in the default database.
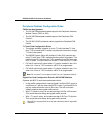
Note: 5215 and 5010 IP phones will fail to register on a system that has a
Default or Premier database because of the line appearances programmed
on keys 8 and 10—keys that exist on the 5207 but not on the 5215 or the
5010. To register these phones, first delete the line appearances in Form
09, or follow the phone replacement procedure on the next page to delete
all key programming.