


31
Basic Installation
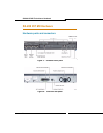
Installing the SX-200 ICP MX Controller
The SX-200 ICP system is shipped with the system software and a default
database installed. The optional components (DSP modules, Analog
Option Module, etc.) are field-installed.
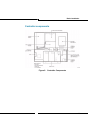
1. Install optional controller hardware or peripheral units according to the
instructions on the pages indicated.
Analog Option Board: page 39
DSP Modules: page 41
Dual FIM Module: page 43
Quad CIM Module: page 44
Dual T1/E1 Framer Module: page 45
Upgraded Internal CompactFlash or Hard Drive: page 46
Stratum Clock Module: see page 48
Network Services Unit, page 54
SX-200 Peripheral Cabinets, age 57.
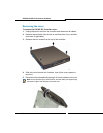
2. Wall mount the units, rack mount them, or place them on a desk or
shelf; see page 32 for instructions.
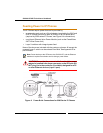
3. Connect the ground stud on the rear panel of the controller to a hard-
wired ground using 18 AWG (0.75mm 2/) gauge wire. The wire must
have green or yellow insulation. Crimp the wire to the ground source.
4. Connect a PC to the Maintenance port on the controller; see page 82.
5. Connect the trunks and phones. See “Connecting the Phones and
Trunks” on page 66.
6. If you are NOT installing software or optional hardware in the controller,
power up the system.
Note: Premier Business systems use the Premier database which must be
installed before enabling the MOSS Options. For more information, see
“Installing an Alternate Database” on page 205.
Note: The NSU is NOT wall-mountable.