Voicemail Pro Page 379
15-601063 Issue 20l (03 March 2009)IP Office
Appendix: Installing IMS
9.1.5.8 Associating Voice Mailboxes with Email Addresses
When you have installed IMS, started the Voicemail Pro server, you are ready to associate the user voicemail mailboxes
with email mailboxes on the Exchange Server. This is done using the IMS Administration tool.
To associate a voice mailbox with an email address
1.Do not proceed with this process until you have completed the steps in Initializing the Call Flow .
2.From the Start menu, select Programs | IP Office | IMS Administration Tool.
3.From the Server menu, if the server is not already populated, select Add. The New Integrated Messaging Server
window opens.
4.In the Server field, type the name of the IMS Server or click Browse and select a server. When the server has been
added, the name is displayed with a [+] plus icon.
5.Expand the [+] icon to show configurable options.
6.Highlight Integrated Messaging Associations. After a few moments the voice mailboxes are displayed in the right-
hand window.
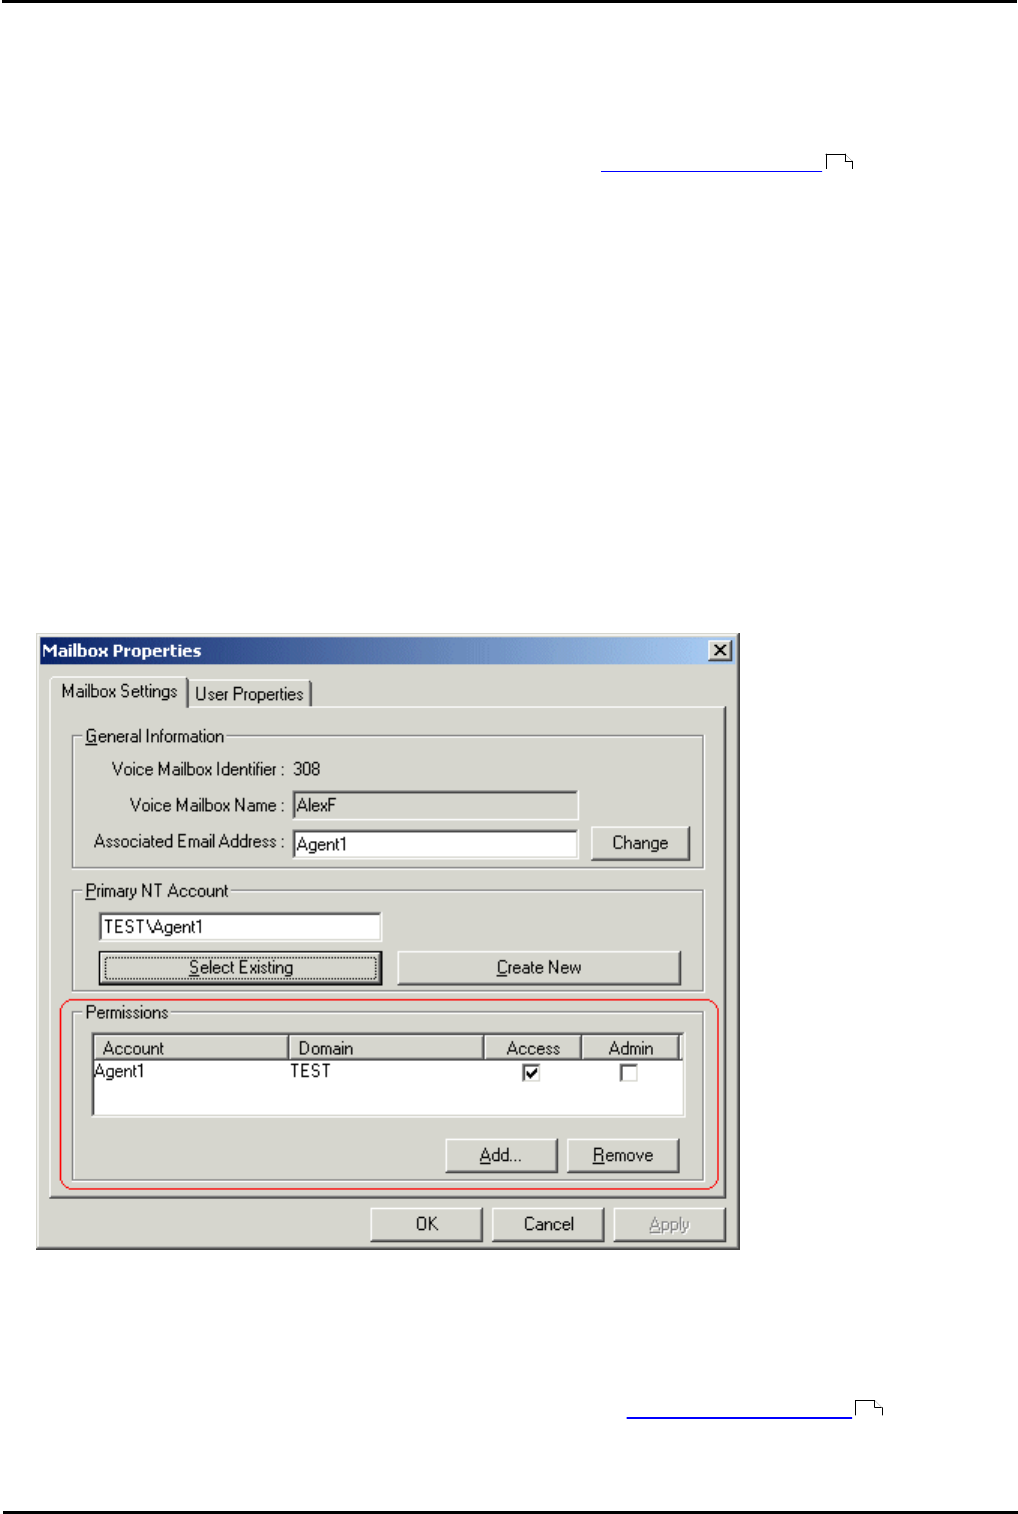
7.Select a voice mailbox to configure and double-click it to see its properties.
8.In the Associated Email Address field, select Change and select the relevant email address of the associated user.
9.If the mail settings need to be different from the default settings, select the User Properties tab and configure as
applicable and select OK.
10.In the Primary NT Account field click Select Existing and select the relevant domain user account of the associated
user. Note, if the user is opening multiple inbox accounts all have to be added.
10.1.IP Office Integrated Messaging Pro (IMS) clients may appear to respond slowly or even lock up where the IMS
client user has defined one or more delegates in Microsoft Outlook. All delegates of an IMS Client’s Outlook should
have their domain account and email address added into the permissions field, with Access permission selected.
11.When complete, click the Synchronize Mailboxes icon to synchronize the mailboxes. Alternatively, click Selecting
Mailboxes and Synchronize on the menu bar.
12.Close the IMS Administration Tool.
13.Make a call to one of the users that you have just associated and leave a message in their voicemail mailbox. A short
while after hanging up a message should arrive in the user’s mailbox.
14.Only when you have completed the above process should you proceed to IMS Client Requirements .
378
380
