Voicemail Pro Page 158
15-601063 Issue 20l (03 March 2009)IP Office
4.7.2 Configuring Message Waiting Indication
By default no message waiting indication (MWI) is provided for hunt groups. If required indication can be enabled for
specific users including users who do not belong to the hunt group. If the user is not a member of the hunt group, a
voicemail code is also required. This is entered in the Voicemail Code field on the Hunt Group > Voicemail tab in the
IP Office's configuration. Alternatively the user can be made a member or the group but have their membership set to
disabled. This allows them to access the group mailbox without receiving group calls.
Depending on the type of telephone phone or IP Office application they are using, users who receive hunt group message
waiting indication can choose any of the following methods to collect messages.
· Phone Manager
If Phone Manager is used, the group name and number of new messages is displayed in the Messages tab. Users click
the Messages tab to access the group mailbox.
· 4400 Series Phones
On phones with a Menu button, press Menu | Menu | Msgs | Voice. The group name is shown along
with the number of new messages. Press the display button to access the group mailbox.
· Voicemail Ringback
If a user has voicemail ringback enabled, ringback will occur for new group messages as well as new personal
messages. Ringback for personal messages takes place before any ringback for new group messages.
This method of configuring hunt group message waiting indication allows individuals, including users who are not
members of the group, to receive hunt group message waiting indication.
To configure message waiting indication:
1.Open IP Office Manager.
2.In the Navigation pane, click User and select the individual user.
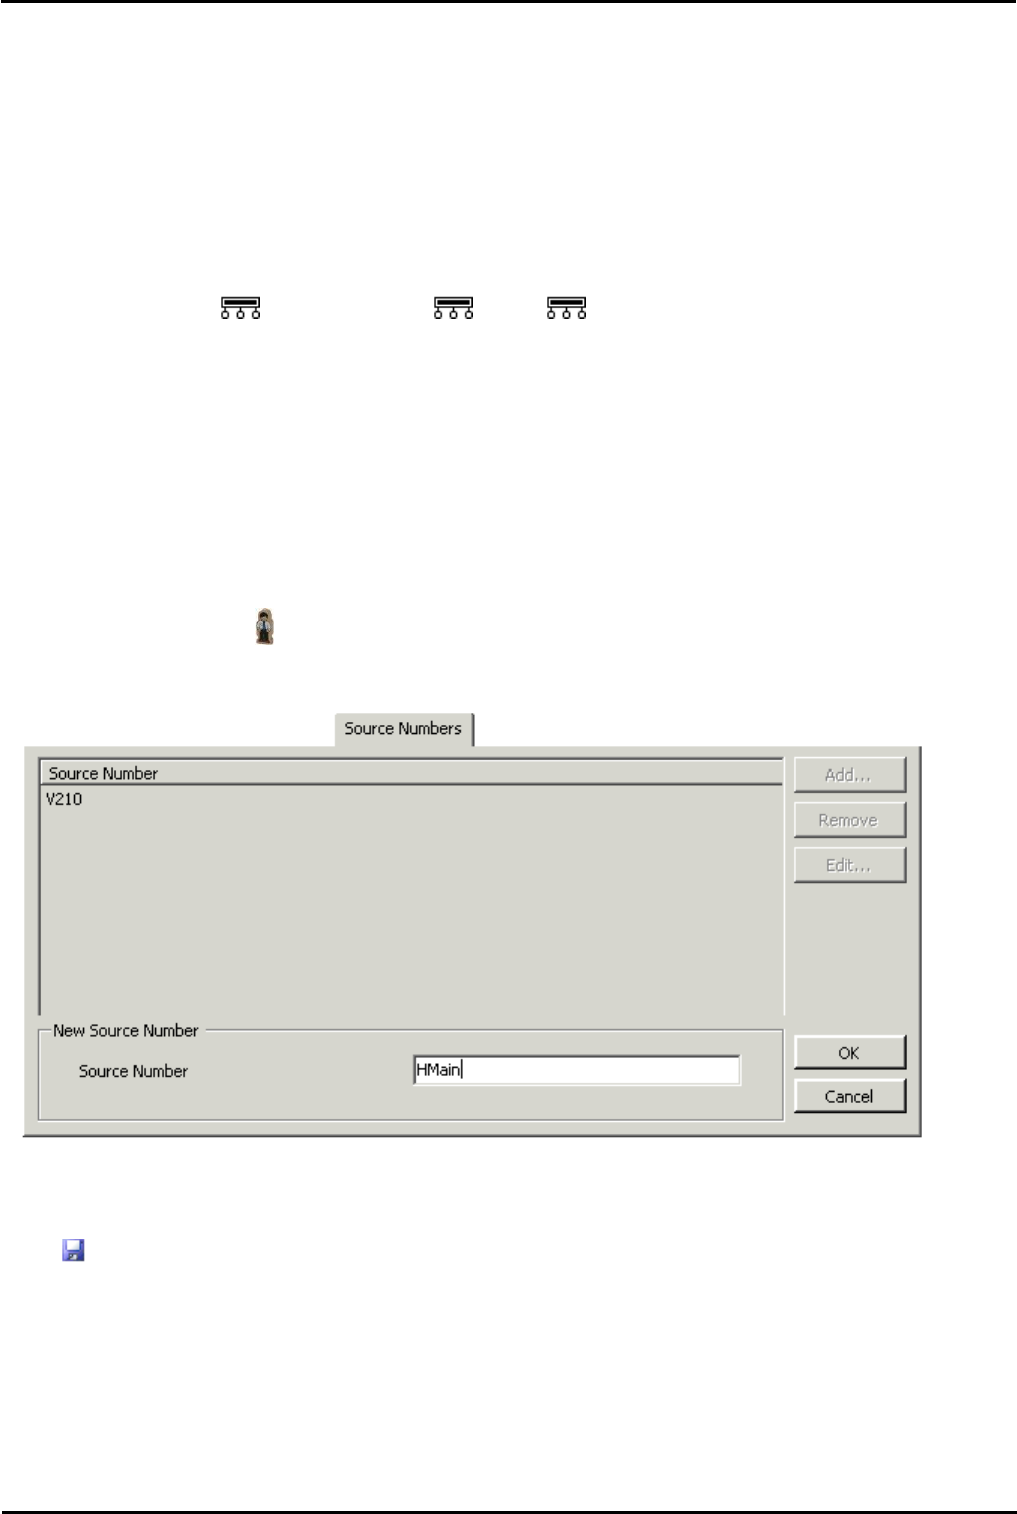
3.View the Source Numbers tab.
4.Click Add.
5.In the Source Number field, enter H followed by the hunt group name. For example, to receive message waiting
indication from a hunt group called Main, enter HMain.
6.Click OK.
7.Click to merge the configuration change back to the IP Office.


