Voicemail Pro Page 374
15-601063 Issue 20l (03 March 2009)IP Office
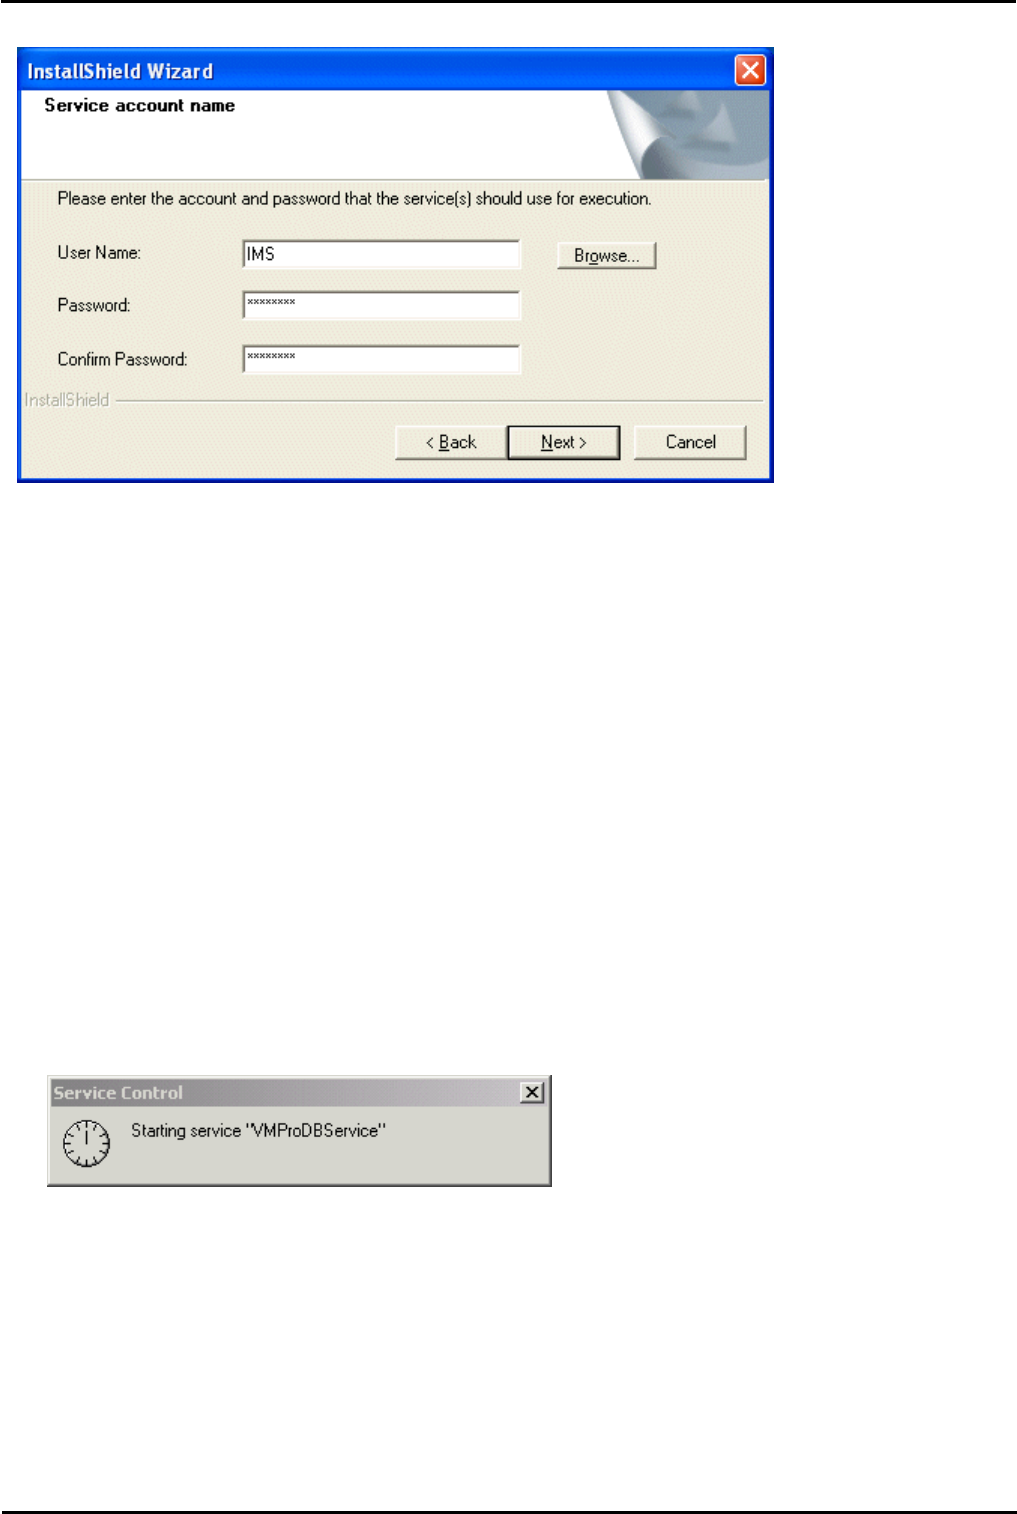
19.In the Service Account Name window, type the User Name and Password for the IMS account created previously
on the domain and Exchange server.
19.1.Alternatively, click Browse and select from the list of available network accounts. The IMS account should show
up in the list. Verify that you can browse for this account. Make sure the IT manager has not hidden this account for
Exchange or has separated this account in Active Directory.
20.Click Next.
21.The Select Program Folder window opens. It is recommended that you use the default folder, IP Office, which will
already be shown. Click Next.
22.The Start Copying Files window opens. You are presented with a summary of the settings that you have chosen so
far. Review the settings to make sure that they are what you expect. In particular, check that the required languages
are listed. Scroll down if necessary. The minimum requirements for IMS are listed below. If for any reason the details
are not what you expect, click Back and make the necessary changes.
22.1.Voicemail Pro
- Voicemail Pro Client.
- Voicemail Pro Service.
22.2.Integrated Messaging Service.
- IMS Client Package.
- IMS Database Service.
- IMS Gateway Service.
- IMS Voice Service.
- IMS Administration Tool.
23.When you are satisfied that the details are correct, click Next to start copying the files. The Setup Status window
opens to keep you informed while the installation takes place.
24.When the installation is complete, click Finish to restart now.
25.An attempt is made to start all services associated with Voicemail Pro and IMS.
26.After the services have started, the installation process continues.