


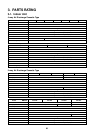


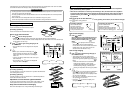
38
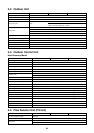
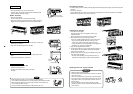
Operation section
Push each button to select the desired operation.
This remote controller can operate up to a maximum 8 indoor units.
• The remote controller can memorize user settings and can be recalled and activated by a single press of
the
ON / OFF
button.
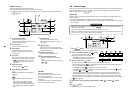
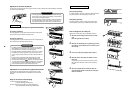
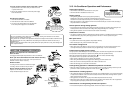
1
Fan mode select button
Selects the desired air speed.
The Concealed Duct High Static Pressure type
models cannot be operated.
2
Timer set button
Used for setting the timer function.
3
Check button
The CHECK button is used for the check
operation. During normal operation, do not
use this button.
4
Fan button
When an after-market fan device is connected
to the system, this button activates the device.
• If
is displayed on the remote controller
when pushing the FAN button, a fan is not
connected.
5
Filter reset button
Resets the “FILTER ” display.
6
Unit and Auto louver buttons
UNIT
:
Select the desired indoor unit by pressing the
unit button.
SWING/FIX
:
Press the button to set the louver into Auto
mode.
• This function is not available on the Con-
cealed Duct Standard Type, High Static
Pressure Type, Floor standing Cabinet Type,
Floor Standing Concealed Type, or Slim Duct
Type.
7
Operation lamp
Lit during normal product operation.
Flashes to indicate malfunction or incorrect
timer setting.
8
ON / OFF
button
Push to cycle between ON and OFF mode.
When the unit is OFF, the Operation Lamp and
the display will turn OFF.
9
Operation select button
Selects the desired operation mode.
10
Set up temperature button
Adjusts the temperature set point for the
room.
Set the desired temperature by pressing the
or .
OPTION :
Remote controller sensor
The temperature sensor in the indoor unit mea-
sures the room temperature.
The remote controller can also measure the room
temperature.
For details of this feature, contact the dealer from
whom you purchased the product.
1
7
3
5
2
8
9
6
4
10
ON / OFF
FAN
TEMP.
SWING/FIXTIME
MODE
VENT
UNITSET CL
FILTER
RESET
TEST
TIMER SET
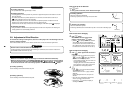
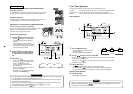
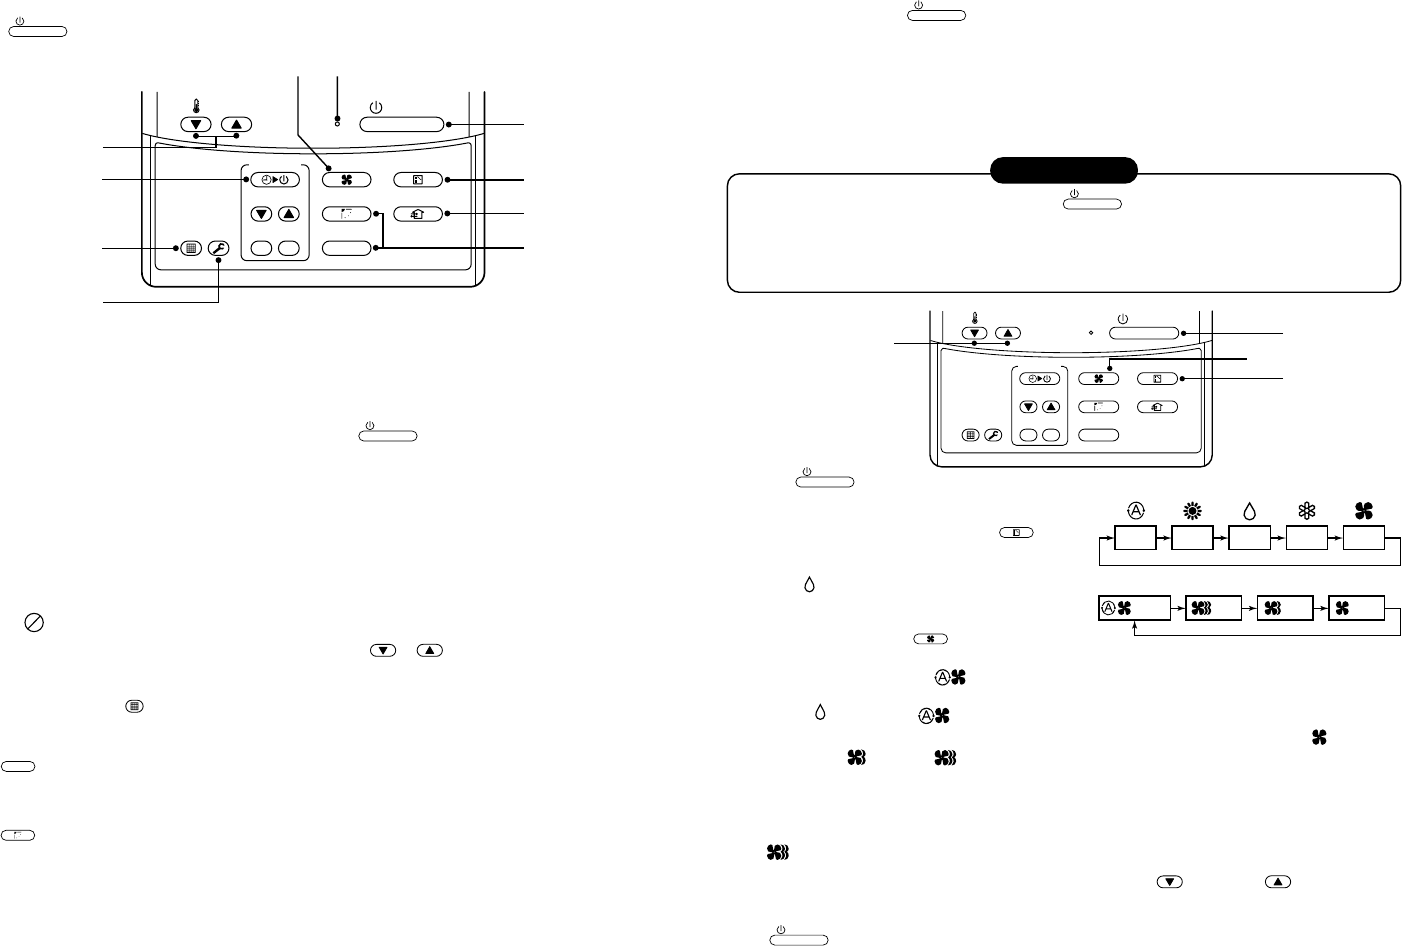
1
Push
ON / OFF
button.
The operation lamp goes on, and the operation starts.
2
Select an operation mode with the
MODE
button.
One push of the button, and the display
changes in the order shown on the right.
•“DRY
mode” function is not available on the
Concealed Duct High Static Pressure Type.
3
Select air volume with
FAN
button.
One push of the button, and the display changes in the order shown on the right.
• When air volume is “AUTO ”, air volume differs according to the temperature difference between
the set temperature and the room temperature.
• In DRY
mode, “AUTO ” is displayed and the air volume is LOW.
• In heating operation, if the room temperature is not heated sufficiently with volume “LOW ” operation,
select “MED.
” or “HIGH ” operation.
• The temperature which the temperature sensor detects is one near the air inlet of the indoor unit.
Therefore it slightly differs from the room temperature according to the installation status. The setup
value is a criterion of the room temperature. (Automatic air speed cannot be selected in FAN mode.)
• Air volume of function is not available on “Concealed Duct High Static Pressure Type” air speed “HIGH
” only is displayed.
4
Determine the set up temperature by pushing the “TEMP. ” or “TEMP. ” button.
Stop
Push
ON / OFF
button.
The operation lamp goes off, and the operation stops.
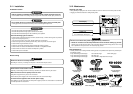
3-8. Correct Usage
When the product is operated for the first time, or after the SET DATA value has been changed, the procedure
below should be followed. The remote controller can memorize user settings and can be recalled and acti
vated by a single push of the
ON / OFF
button.
Preparation
Power the system by switching the electrical isolation device on and by pushing the ON/OFF button on the
remote controller.
• When the power is switched on, a partition line is shown on the remote controller display.
• The remote controller performs a self-check function for approximately 1 minute during which user input will
not be accepted.
REQUIREMENT
• While using the air conditioner, operate it only with
ON / OFF
button without turning off the main power
switch and the leak breaker.
• Do not turn off the earth leakage breaker while the air conditioner is in use.
• When the air conditioner has not been operated for a period of time, ensure the earth leakage breaker is
turned on for 12 or more hours prior to the start up of operation.
1
3
2
4
ON / OFF
FAN
TEMP.
SWING/FIXTIME
MODE
VENT
UNITSET CL
FILTER
RESET
TEST
TIMER SET
HEAT DRYAUTO COOL FAN
(Dehumidity)
LOW MED. HIGH
AUTO