218
Method 2
Before exchange, it is impossible to read out the setup contents due to EEPROM error.
Exchange of P.C. board for service & power ON: Procedure 2
ò
Writing-in of the setup data such as the model name, capacity code, indoor unit address high ceiling setup,
connection setup of option,
etc to EEPROM based upon customer’s information: Procedure 3
ò
Power supply reset (All the indoor units connected to the remote controller in case of group operation control)
Procedure 1 : Readout setup contents from EEPROM
(Contents of EEPROM with setup changed at local site include setup at shipment from the factory are read out.)
1. Push
SET
+
CL
+
TEST
buttons simultaneously for 4 seconds or more.
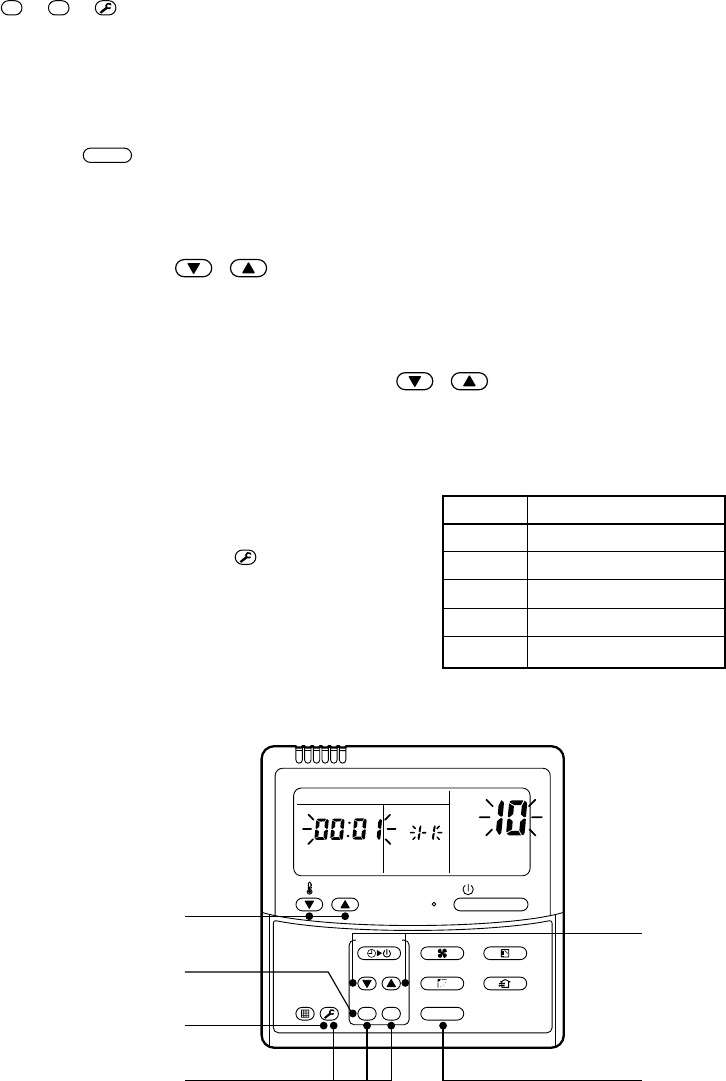
1
(Corresponds to number of the operation diagram of the remote controller in page 218.)
∗ In a group operation control, the firstly displayed unit No. indicates the header indoor unit No.
In this case, is displayed in the item code (DN). The fan of the selected indoor unit operates, and also
starts swinging in a model with flap.
2. Every pushing
UNIT
, the indoor unit Nos. in the group control are displayed successively.
2
(Corresponds to number of the operation diagram of the remote controller in page 218.)
Specify the indoor unit No. to be exchanged.
∗ The fan of the selected indoor unit operates, and also starts swinging in a model with flap.
3. Using temperature setup / buttons, the item code (DN) can be moved up/down one by one.
3
(Corresponds to number of the operation diagram of the remote controller in page 218.)
4. First change the item code (DN) from → . (Setup of filter sign lighting time)
In this time, make a note of contents of the displayed setup data.
5. In the next time, change the item code (DN) using / buttons.
Make a note of contents of the setup data as same as the above.
6. Then repeat item 5., and make a note of contents of the important setup data as indicated in the attached
table (Example).
∗ The item code (DN) is consisted with to )) .
DN No. may jump on the way.
7. When noting has finished, push
TEST
button to
return to the normal stop status.
6
(Corresponds to number of the operation diagram
of the remote controller in page 218.)
(It requires approx. 1 minute to operate the remote
controller.)
<Remote controller operation diagram>
3
6
1
5
2
4
ON / OFF
FAN
TEMP.
SWING/FIXTIME
MODE
VENT
UNITSET CL
FILTER
RESET
TEST
TIMER SET
UNIT No.
DATA
SET
R.C. No.
DN
10
11
12
13
14
Contents
Type
Indoor unit capacity
Line address
Indoor address
Group address
Type and capacity of
the indoor unit are
necessary to set up
the revolution
frequency of the fan.
Item code necessary at minimum


