


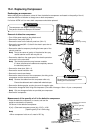
208
No.
3
Part to be
exchanged
Heat
exchanger
Work procedure
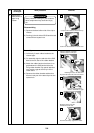
REQUIREMENT
Wear protective clothing on your hands as
other components may cause and injury etc.
Before beginning the procedure, ensure the
refrigerant has been reclaimed from the
outdoor unit, using a suitable refrigerant
recovery device.
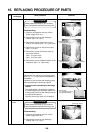
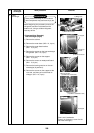
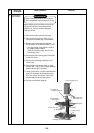
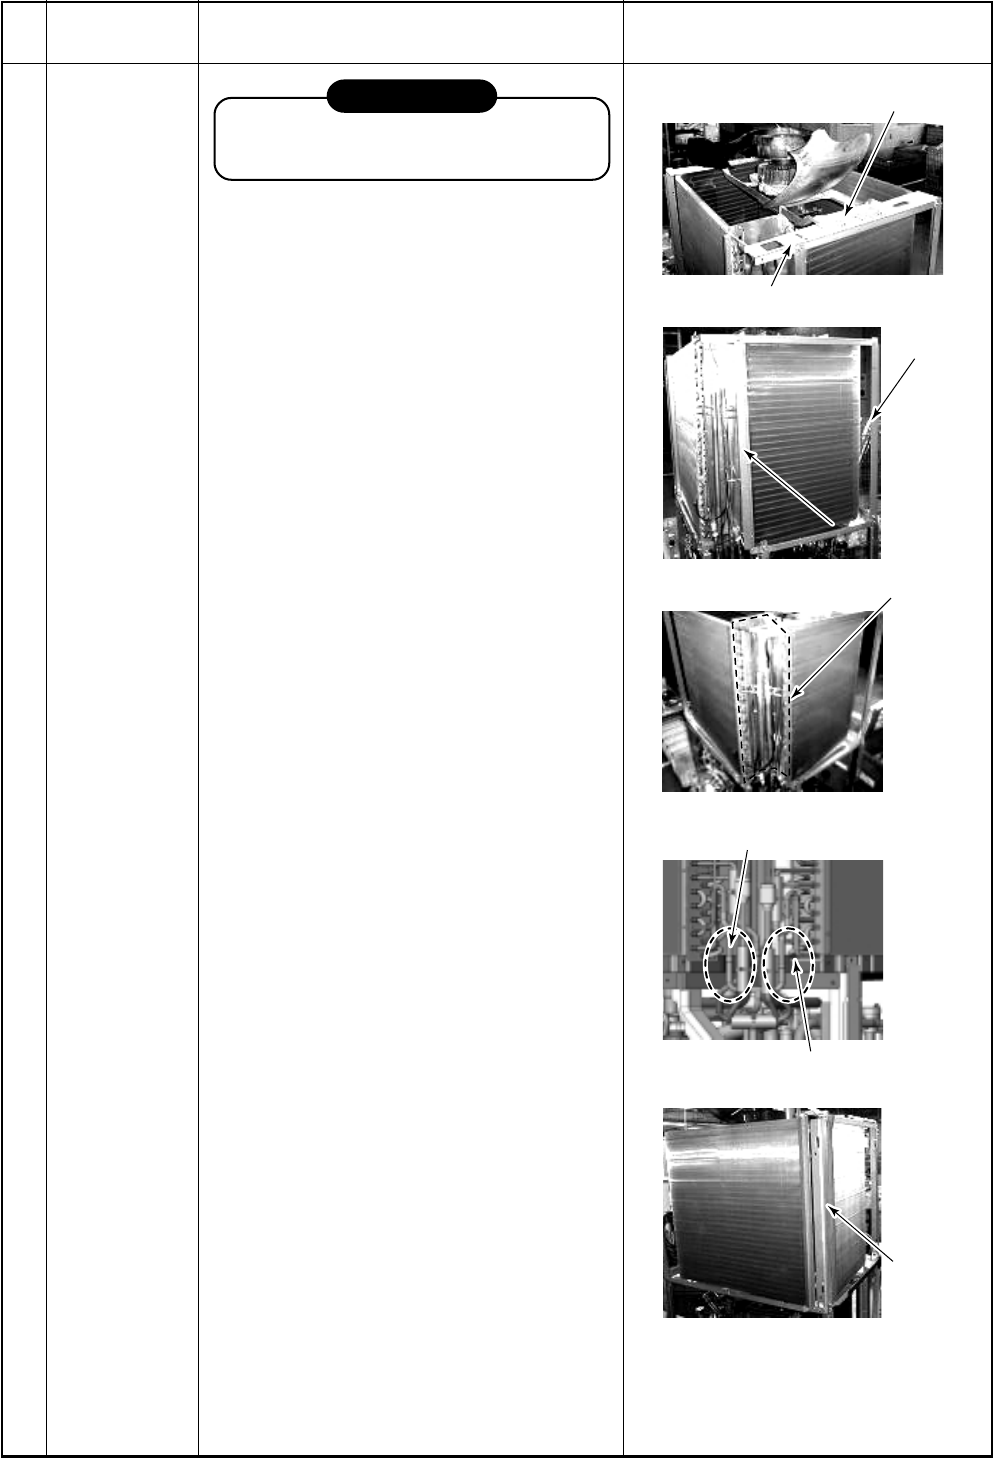
M Disassembling (Example):
Heat exchanger (Right)
1) Remove the cabinet.
2) Remove the motor base. (M5 × 10, 4 pcs.)
3) Remove the motor base bracket.
(M5 × 10, 5 pcs.)
4) Remove the screws on the heat exchanger
fixing board. (M5 × 10, 6 pcs.)
5) Remove the screws on the support.
(M5 × 10, 3 pcs.)
6) Remove the screws on waterproof board.
(M4 × 10, 3 pcs.)
7) Remove the brazing section on the con-
nected pipe (8 positions).
8) Remove the screws on the support at the
rear side, and then pull out the heat ex-
changer. (M5 × 10, 2 pcs.)
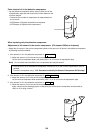
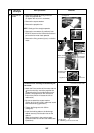
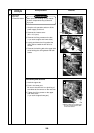
2)Motor base
Heat e
Heat e
xchanger
xchanger
(Left)
(Left)
Heat e
Heat e
xchanger
xchanger
(Right)
(Right)
Heat exchanger
(Left)
Heat exchanger
(Right)
5)Support
4)
4)
Heat e
Heat e
xchanger
xchanger
fixing board
fixing board
4)Heat exchanger
fixing board
6)Waterproof board
7)Brazing section
(4 positions at header side)
3)Motor base bracket
7)Brazing section
(4 positions at distributor side)
8)
8)
Rear side
Rear side
8)Rear side
8)Support
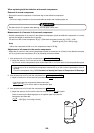
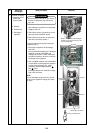
Remarks
Draw it out it backwards.
(Draw it out forwards in case of a left
side heat exchanger.)