


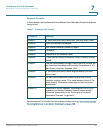

Configuring the Auto Attendant
Working with the Auto Attendant Greetings
SPA9000 Voice System Administration Guide 134
7
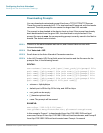
Recording an Auto Attendant Prompt
Follow this procedure to overwrite an existing recording or to add a new
recording.
NOTE Customized prompts are erased when a factory reset is performed on the
SPA9000.
STEP 1 Connect an analog phone to the Phone 1 or Phone 2 port of the SPA9000.
STEP 2 Press the star key (*) four times: ****
The IVR plays the following prompt: Linksys configuration menu. Please enter the
option followed by the # (pound) key or hang up to exit.
STEP 3 Press 72255# to access the Auto Attendant message settings.
The IVR plays the following prompt: Please enter the message number followed
by the # (pound) key.
STEP 4 Enter the number of the message (1 through 10) that you wish to record, review, or
delete.
The IVR plays the following prompt: Enter 1 to record. Enter 2 to review. Enter 3
to delete. Enter * to exit.
STEP 5 Press 1 to record a new message.
NOTE The IVR checks the available buffer size. If there is no more buffer capability,
IVR plays the Option Failed message and returns to the previous menu.
If the buffer space is sufficient, the IVR plays the following prompt: You may
record your message after the tone. When finished, press #.
STEP 6 After the tone, record the new message and then press #.
The IVR plays the following prompt: To save, enter 1. To review, enter 2. To re-
record, enter 3. To exit, enter *.
STEP 7 Press 1 to save the new recorded message.
The IVR plays the following prompt: One moment, please.
STEP 8 Wait for several seconds while the save is completed.