5-25
INSTALLATION-DK 16 KSU & PCB
SECTION 100-816-205
MARCH 1993
external amplifier. However, the system must be
programmed for one; see Paragraph 10.40. The
external amplifier requires Circuits 6 and 7 on the
PESU. See Peripherals Installation, Section 100-
816-207, for external amplifier installation instruc-
tions.
10.20 PESU Installation Procedure
10.21 Install the PESU in accordance with the
following steps:
1) Remove the PCB from its protective packag-
ing. The protective shield on the back of the
PESU is designed to protect the installer from
potentially hazardous ring voltage. Do not
remove this shield.
2) Ensure that the PESU subunit (ESTS) is
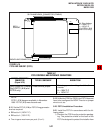
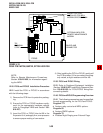
securely attached to the PESU (refer to Figure
5-15).
3) If the electronic telephones connected to the
PESU must receive OCA calls, install the
EOCU subassembly PCB on the PESU per
Paragraph 10.12.
4) If a BGM source is connected to the PESU,
Circuit 8, cut W7.
5) Ensure that the ring voltage option, P90, is set
to the “H” position for initial installation. The “L”
position is used if devices connected to the
PESU trip ring voltage before answer.
6) Insert the PESU into the appropriate slot, and
apply firm, even pressure to ensure proper
mating of connectors.
7) After installing the PESU, gently pull the PCB
outward. If the connectors are properly mated,
a slight resistance will be felt.
10.30 PESU Wiring
10.31 Refer to PESU Wiring Diagram, Section
100-816-208, for wiring/interconnecting details.
10.40 PESU Programming Overview
10.41 The following parameters may be specified,
through programming, for the PESU:
Program 03
Specify code 25 for all slots that have PESUs
without EOCU.
Specify code 26 for all slots that have PESUs
equipped with EOCU.
NOTE:
A special code is not required to connect BGM
to a PESU.
Program 31
Configures the PESU Circuits 1 and 2 for con-
nection to voice mail devices.
Program 10-2
Sets the standard telephone ring cadence for
normal or distinctive ringing and BGM source
connection.
Program 10-3
Used for external amplifier connection.
Program 19
Also used for BGM connection.
11 CO LINE UNIT (PCOU)
11.00 General
11.01 The PCOU PCB adds four CO lines to the
system and it can only be installed in the Expansion
Unit. The PCOU provides Ring Detection, Dial
Outpulsing and Hold; as well as Automatic Busy
Redial (ABR) circuitry. Each CO line can be pro-
grammed for Dual-Tone Multi-Frequency (DTMF)
or dial pulse.
NOTE:
There are two PCOU versions (1 and 2). They
are identical in fit/form/function and are inter-
changeable in all DK system models.
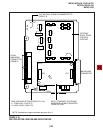
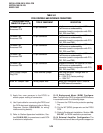
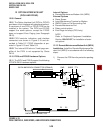
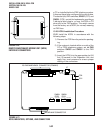
11.02 PCOU controls, indicators, and interface
connectors are shown in Figure 5-17 and described
in Table 5-E.
11.10 PCOU Hardware Options
11.11 There are no hardware options supported
by the PCOU.
11.20 PCOU Installation Procedure
11.21 Install the PCOU in accordance with the
following steps:


