


Administering Tape Save/Restore Operations
If you do not have a digital tape unit, you should skip this chapter.
The procedures described below assume that your digital tape unit is correctly connected and
turned on. See the System 25 Installation and Test Manual for further information. It is also
assumed that you will use a high quality audio cassette tape. It is important that you make
two backup tapes and that you verify each of those tapes every time you save translations.
Keep the following considerations in mind when performing tape save/restore operations:
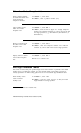
■ Be sure connector “3” is assigned to the “Save Restore Tape” capability (see Administering
RS232 Parameters to reassign the connector).
■ Be sure the tape deck is plugged into connector “3” of the cable.
■ To save (Action=1), you must press the PLAY and RECORD buttons.
■ To verify (Action=2) and restore (Action=3), you must press the PLAY button,
Caution Action=3 will interrupt phone service for about five minutes.
Save/Restore
It is most unlikely that your System 25 would encounter a major catastrophe in which all
your translations were lost. However, if such an event were to occur, a backup tape would
allow you to restore system translations (the most current you have saved) in about five
minutes. It takes only a few minutes to make a backup tape. It’s important that you keep at
least three tapes of past translations, updating the two oldest tapes during system save
procedures. This way, if something goes wrong during a save procedure and both tapes of
the current system translations are damaged, you’ll still have a previous version on tape to
use as a backup.
Verify
You should always verify a completed tape save operation. Successful completion of the
Verify command assures you that what you have saved on tape matches exactly the
translations in your system.
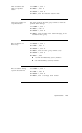
Using the Digital Tape Unit
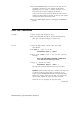
To insert the cassette and
1 Press the STOP/EJECT button on the tape unit. The
rewind the tape plastic cover over the cassette well pops up.
2 Insert the cassette into the cassette well (Side A up) so that
the exposed tape faces the tape unit’s buttons. Press the
cassette down until it snaps into place.
3 Close the plastic cover.
(continued)
Administering Tape Save/Restore Operations
13-1