mstallat/$n
IMI 66-083
INSTALLATION
Each add-on expansion module measures 15.5 wide x
-1.4
high x 1.6 wide and weighs approximately 4
pounds. The modules are designed to be attached to
the base unit and connected to it via cabling.
l
The first module must be connected to the upper
location on the base unit.
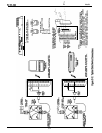
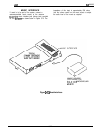
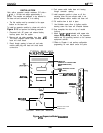
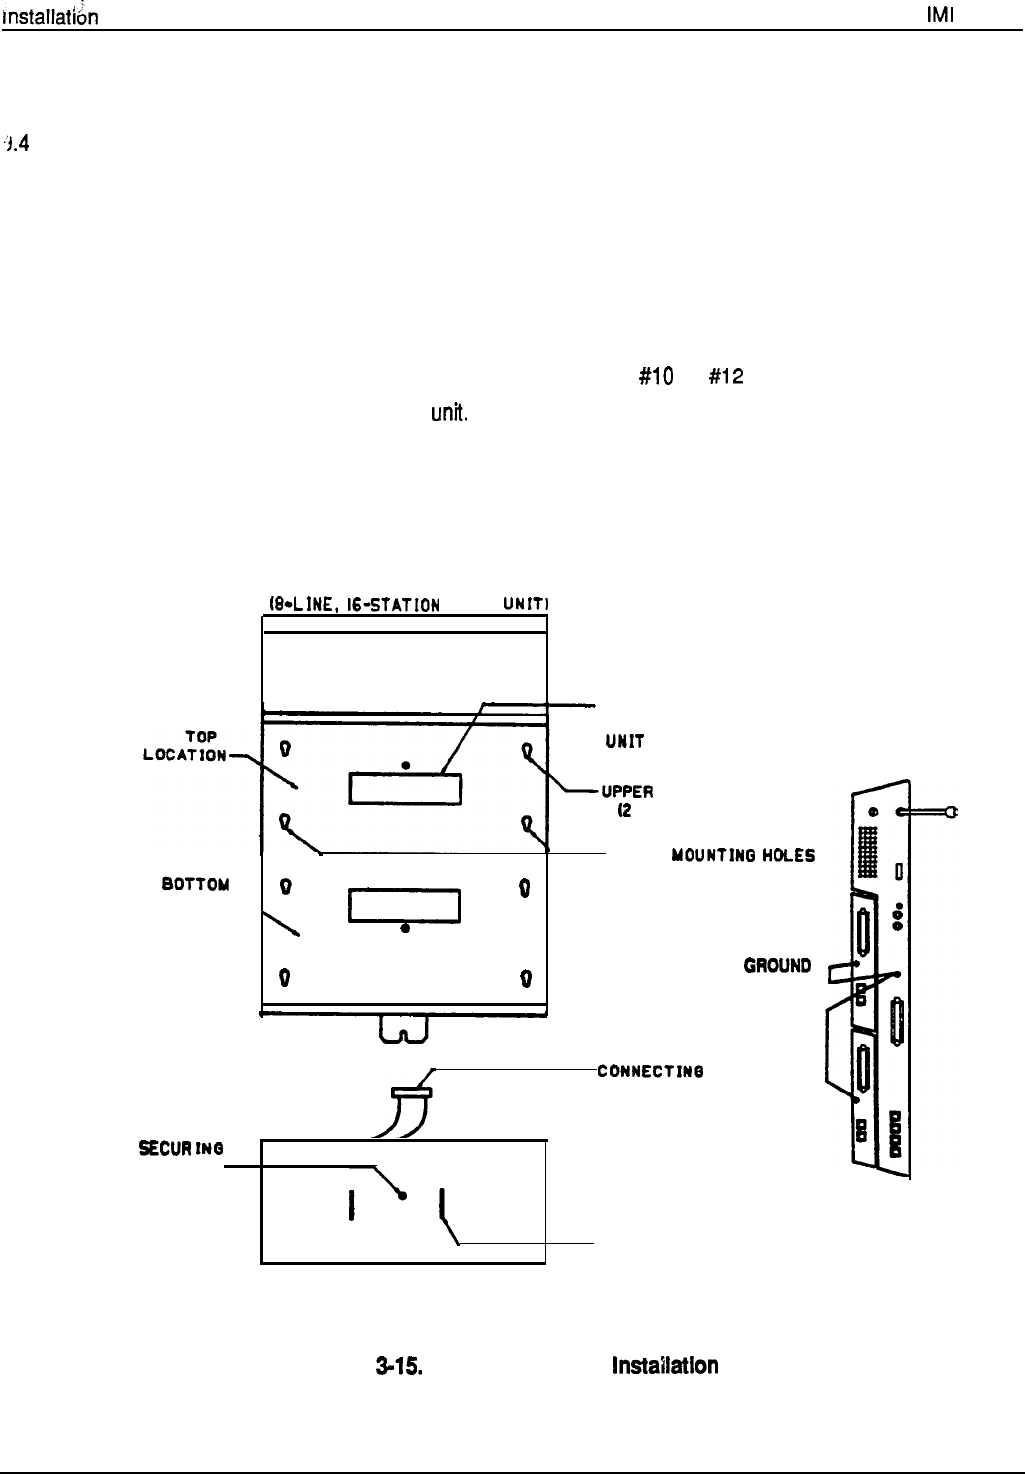
To install an expansion module to a base unit, refer to
Figure 3-15
and perform the following procedure.
1. Disconnect both AC power and external battery
back-up power from the system.
2. Remove and set aside nameplate from base unit.
This action exposes internal cable connector on
base unit circuit board.
3.
Reach through opening in base unit and mate
module cable plug with base unit circuit board
connectors.
4. Push excess cable inside base unit housing
through connector opening.
5. install expansion module in place on all four
mounting holes. Be sure excess cable is not
pinched between add-on module and base unit.
6. Pull module down to latch in place.
7.
Use flat-blade screw driver to tighten module
securing screw into base unit threaded fastener.
8. Snap nameplate into slots on top of module
housing.
9.
Attach a
#lO
or #12 insulated, solid copper wire
between the grounding terminal on the expansion
module and the grounding terminal on the common
equipment cabinet.
1 O.Refer to Chapter 4, and perform configuration
programming for new station and/or line ports.
TYPICAL BASE UNIT
(O-LINE,
I6-STATION
BASE
UNITI
lllllllllllllllllllllllllllllllll
lllllllllllllllllllllllllllllllll
lllllllllllllllllllllllllllllllll
lllllllllllllllllllllllllllllllll
NAMEPLATE
(REMOVE TO EXPOSE BABE
UNIT
CONNECTORS)
LUPPER
MOUNTING HOLES
I2
PLACES)
.
LOWER
YOUNTINB
HOLES
BOTTOU
Q
12
PLACES1
LOCATION-y
I
0
0
0
9
GROUND
MODULES
TO BABE
UNIT
CONNECTIN
CABLE
AND PLUB
BECUR
INB
SCREW
I’
(
SNAP SLOTS FOR
NAMEPLATE
TYPICAL ADD-ON MODULE
Figure
3-15.
Expansion Module
lnstallatlon
3-26


