


Chapter 4 Using the Cisco 7920 Configuration Utility
Overview of the Application Windows
4-14
Cisco Wireless IP Phone 7920 Administration Guide for Cisco CallManager Release 3.3 or Later
OL-3930-02
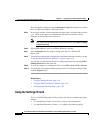
Step 1 From the menu bar, choose Connection > Logout.
The Logout window appears.
Step 2 Click Yes to confirm that you wish to log out.
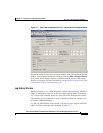
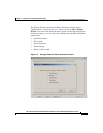
Uploading the Firmware Image
The Upload Firmware Image window allows you to specify a firmware image
filename and to upload the file to the Cisco Wireless IP Phone 7920.
You need to log in before choosing the Connection > Upload Firmware Image.
After the firmware image is uploaded, the Cisco Wireless IP Phone 7920 will
reboot automatically. You need to log in again to continue configuring the
Cisco 7920 Wireless IP Phone with the Cisco 7920 Configuration Utility. The
history log records the uploading firmware image event.
Caution Be sure that the firmware image version in Cisco CallManager is the same as the
firmware version that you uploaded to the phone. If the firmware version is
different in the Cisco CallManager server, the next time the phone connects to
Cisco CallManager, the phone gets that firmware version downloaded from
Cisco CallManager.
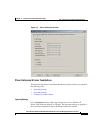
Resetting to Factory Default
When you restore the settings to factory default values, all the settings in the
Cisco Wireless IP Phone 7920 are restored to the original settings, including Call
History, and Profiles settings. All Speed Dial settings are removed; however, the
data stored in the Phone Book is preserved. After resetting to factory defaults, you
must reconfigure your custom network settings by using the Settings Wizard. See
“Using the Settings Wizard” section on page 16 for more information.
Choose Connection > Restore to Factory Default. After the factory default
settings are restored, the Cisco Wireless IP Phone 7920 powers down
automatically.