


Polycom VVX 500 and VVX 600 Business Media Phones and Polycom VVX Camera User’s Guide
Polycom, Inc. 84
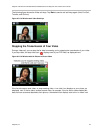
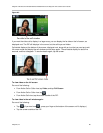
Stopping the Transmission of Your Video for All Calls
You can stop your phone from automatically transmitting your video at the start of all calls.
Caution: Does Stopping Video Create an Audio-Only Call?
Stopping video doesn’t create an audio-only call. Even if you stop video, video information is still
transmitted to the far side as a still picture, and the call is still a video call. To dial an audio-only call,
see Placing Audio-Only Calls.
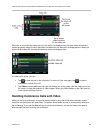
To enable or disable the transmission of your video for all calls:
1. Tap Settings from Home view, and tap Basic > Video > Video Call Settings.
2. From the Video Call Settings screen, tap Auto Start Video Tx, and either enable or disable the
setting.
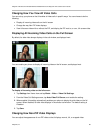
When enabled, your phone automatically transmits video at the start of all calls. When disabled,
your phone does not automatically transmit video at the start of all calls, and displays next to
your video during video calls. The default setting is Enabled.
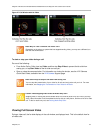
Changing the Clarity of Your Video
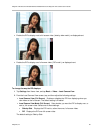
You can change the clarity of your video, including the brightness, contrast, and sharpness of your video
stream. If your camera faces a bright light source, such as a bright window, you may need to increase the
camera’s brightness, contrast, and sharpness levels so the far side can see you better. To see how you
look to the far side, view the PIP.
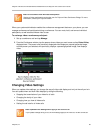
To change the clarity of your video:
1. Tap Settings from Home view, and tap Basic > Video > Camera Settings.
2. From the Camera Settings screen, tap, and then adjust, the following camera settings:
Target Frame Rate sets how smoothly your video displays. You can set a rate between 5
(least smooth) and 30 (most smooth). The default rate is 25.
Brightness Level sets how bright your video displays. You can set a level between 0
(dimmest) and 6 (brightest). The default level is 3.
Saturation Level sets how much color your video displays. You can set a level between 0
(lowest) and 6 (highest). The default level is 3.
Contrast Level sets the difference in brightness between the light and dark areas of your
video. You can set a level between 0 (no contrast increase) and Auto (noise reduction contrast).
The default level is 0.
Sharpness Level sets the clarity of detail in your video. You can set a level between 0
(lowest) and 6 (highest). The default level is 3.
Flicker Avoidance adjusts the flickering of your video captured by the camera sensor. Tap 50
Hz (flicker avoidance for Europe and Asia) or 60 Hz (flicker avoidance for North America). The
default is 50 Hz.