


Technical Product Manual - DCT1900
Installation Instructions, Base Station – KRC 101 1371
Install-DCT1900/R8/mw 16-7
© 2000-2005
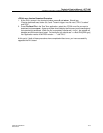
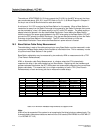
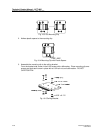
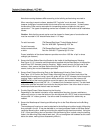
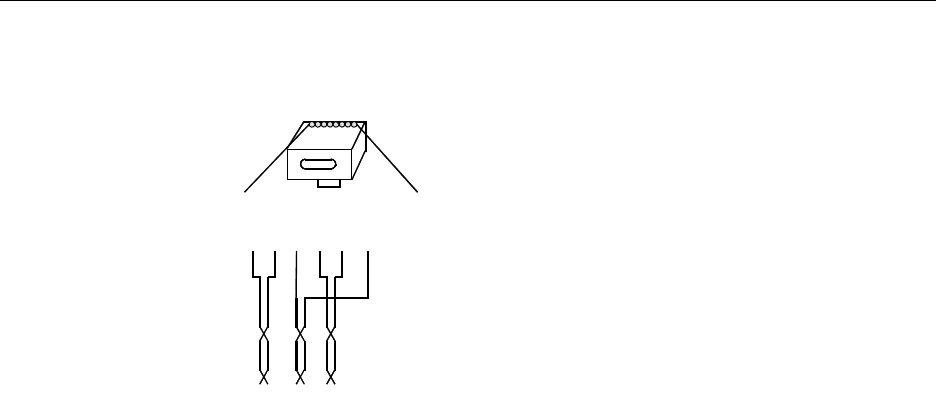
Fig. 16–2 Connector Pinning
Note:
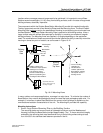
After completion of the installation, Base Stations must be added using the CSMW “Installer Quick
Guide”.
16.6 Base Station Mounting - Indoor
16.6.1 Wall Mount
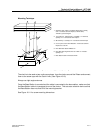
The Base Station comes with its own Base Station mounting bracket. The necessary antenna are
ordered and shipped separately. The Base Station is to be mounted such that when wall mounted
the top of the antenna is at least 6 inches below the ceiling. If the ceiling is made of metal or
contains a metal plate, the distance between the metal plate and the antenna must be at least one
foot.
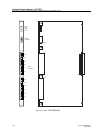
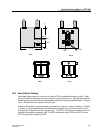
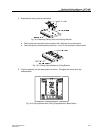
Once the location where the Base Station is to be mounted has been determined, take the
mounting plate (see Fig. 16-1, Base Station Cover and Back) and spot it where the Base Station is
to be mounted.
1. Mark the location for the mounting hardware.
2. Secure the rear bracket to the wall. Use #6 mounting hardware. The side of the bracket with
the part no. SXANB 101 127/X goes towards the wall.
3. Plug the Base Station cable into either one of the RJ45 jacks on the back of the Base Station.
4. Place the Base Station over the rear plate on the wall and slide it down until the Base Station
locks in place onto the rear bracket.
5. Connect the antenna to the Base Station, then slide the rubber grommet supplied with the
antenna kit down over the antennas until they are firmly seated in the Base Station itself.
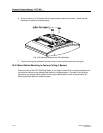
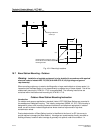
16.6.2 Ceiling Mount
A kit, part number NTM 201 1754 is provided for the ceiling mounting of base stations. Ine kit is
required for each ceiling mounted base station. Teh following instructions, also the kit are included
for reference.
Instructions - Ceiling Mount Kit
1. Cut out center portion of mounting clip to make room for ceiling clip threads.
RJ45
modular jack
EPP1
EPP0
SC1-0
SC0-0
SC0-1
SC1-1
NC
NC
SC=Serial Channel
EPP=Express Power Pair
NC=Not Connected
Pin 3 = SC1-0 - white/blue
Pin 4 = SC0-0 - white/orange
Pin 5 = SC0-1 - orange/white
Pin 6 = SC1-1 - blue/white
Pin 1 = EPP1 - green/white
Pin 2 = EPP0 - white/green