


4.2 CONNECTING THE KX-TVS50/80 WITH THE PANASONIC KX-TA624
INTEGRATING THE VPS WITH THE PANASONIC KX-TA ANALOG PBX AND KX-TD DIGITAL PBX
71
CAUTION
When 2 VPSs are connected to the KX-TA624, the following 2 procedures should be done to
make the VPSs work correctly.
1.
Delete a mailbox in either VPS so that each extension has only ONE MAILBOX.
After Auto Configuration has been executed, an extension has a mailbox in both
VPS1 and VPS2. However each extension can have a maximum of 1 mailbox in
either VPS. To delete a mailbox, Type [D] (Delete) in the "Make (Make/Delete)"
field (see "Step 4 Creating Mailboxes" in
5.1.3 Starting the Quick Setup).
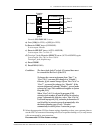
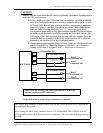
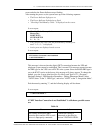
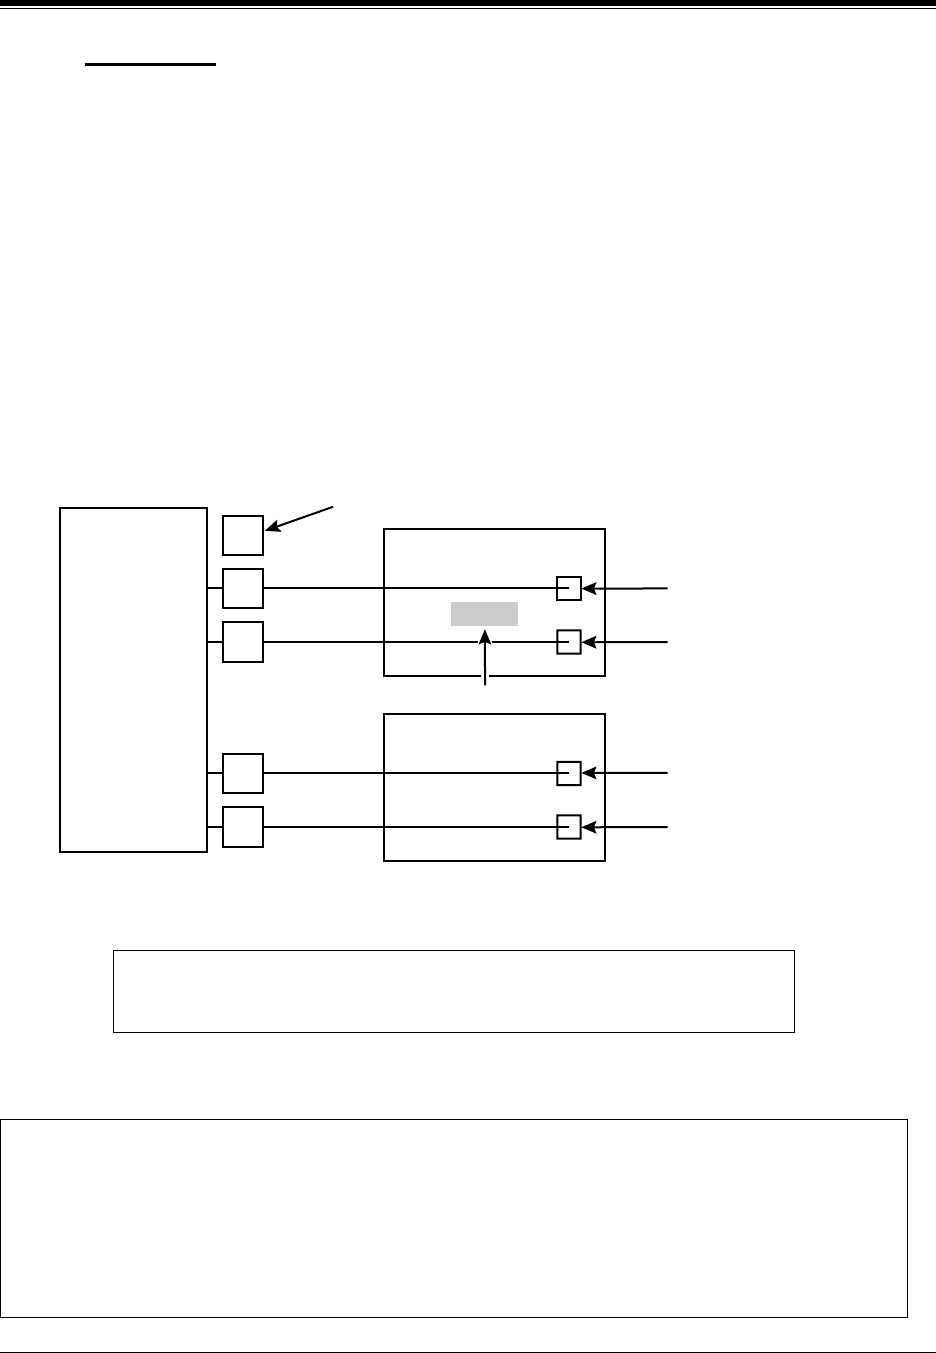
The extension should assign a Voice Mail extension from the VPS which contains
its mailbox as the destination for Call Forwarding and Voice Mail Transfer. DO
NOT assign a Voice Mail extension from the other VPS. For example, if jack 06
(extension 106) has its mailbox in the VPS1, assign extension 107 or 108 as the
destination, not extension 115 or 116 (see diagram below).
2.
Change the extension numbers of both VPS port 1 and 2 for VPS2 from 107 and
108 to 115 and 116 (see "Extension Number of VPS Port 1" and "Extension
Number of VPS Prot 2" in Table 67 in
B7.3 PBX Interface Parameters
).
Set the DIP switch to position 0 after initialization is complete.
TEST: Press the INTERCOM button and then [107]. If the VPS
answers, you have an APT connection.
The required programming is complete and the VPS and KX-TA624 should be able to communicate
through Digital Integration.
When running the Quick Setup command (Section 5 CUSTOMIZING THE SYSTEM) from the
VPS, the PBX transmits the station information automatically. This saves time when programming
the VPS.
7
6
8
KX-TA624
KX-TVS50/80 (VPS1)
Port 1
Extension 107
Port 2
Extension 108
Extension 106
Mailbox for Extension 106
15
16
Port 1
Extension 115
Port 2
Extension 116
KX-TVS50/80 (VPS2)