


Getting Started
Registering a Cisco SPA302D Handset
Cisco SPA232D Administration Guide 17
1
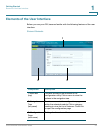
Note: The Cisco SPA232D assigns DECT Line1 as the default line for outgoing
calls from Cisco SPA302D handsets. If needed, you can configure additional VoIP
accounts as separate “DECT Lines.” To do so, choose the Voice menu, and then
use the DECT Line 1~10 links in the navigation tree. Use the check boxes on the
Quick Setup page to associate the DECT Line(s) to each handset.
STEP 7 Click Submit to save your settings.
STEP 8 If you wish to change the PIN for handset registration, open the Voice > System
page, and then enter up to four digits in the Handset (HS) Pairing Password field.
Click Submit to save your settings.
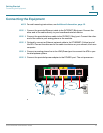
Registering a Cisco SPA302D Handset
You can register Cisco SPA302D handsets to the integrated DECT base station.
These handsets can be purchased separately.
STEP 1 On the Cisco SPA302D handset, press the center Select button on the 4-way
navigation keypad.
STEP 2 Select Register.
STEP 3 Using the navigation arrows, scroll to the Settings icon and press the center
navigation button to select it.
STEP 4 Select Handset Registration.
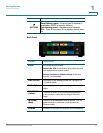
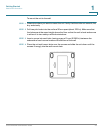
STEP 5 On the Cisco SPA232D, press the Page/Registration button and hold it down for
at least seven seconds until the green status light flashes quickly.
TIP: If you press the button for fewer than seven seconds, the green status light
flashes slowly, indicating the unit is in “paging” mode and is not in registration
mode. Registration will not work if the unit is in paging mode.
STEP 6 The default PIN is blank, so do not enter a PIN. Press the left softkey to confirm that
you want to register the handset. The “registering” message appears.
STEP 7 To verify that the handset registered to the base station, confirm that the wireless
status icon is solid and that the handset ID, such as DECT1 or DECT 2, appears
near the top right corner of the display screen.