


Conversion Instructions
Issue 1 June 2000
2-19
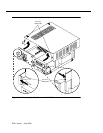
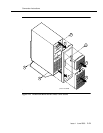
3. Pull the top cover toward you until it snaps into the locking tabs located on
either side of the front of the unit.
4. Lock the system unit by inserting the key into the lock and turning
clockwise to the locked position.
5. Align the front panel with the front of the unit and hook the top flanges of
the panel underneath the top cover.
6. Lower the panel and snap into position so that the panel latches have
caught. Make sure the power button is correctly aligned during this step to
avoid damage.
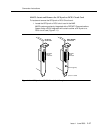
!
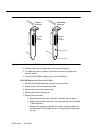
WARNING:
The front panel fits tightly around the streaming tape drive. You may
have to adjust the panel to put it on. This may cause the power
switch to be pushed in.
7. Reconnect any cords or lines that you removed from the system.
8. Reconnect the monitor and the keyboard.
9. Reconnect the power cords.
10. Apply power to the system.
The system initiates the Power-On Self Test (POST).
The following appears on the screen and the system waits here for
approximately 15 seconds.
486SX BIOS V1.2R1.5tt1
020096 KB Memory Good
000384 KB Shadow Ram
000128 KB Cache Ram
11. Continue with Task 8, "Allow the System to Finish Booting" on page 2-28.
MAP/40 Instructions
For additional information about the MAP/40, see INTUITY MAP/40 Hardware
Installation, 585-310-138.
MAP/40: Open the MAP
1. Remove the incoming AC power cord, keyboard, and video cord.
2. Tag the power cord plugs with a note indicating that nobody other than
yourself should reconnect power to this equipment.
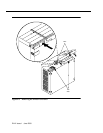
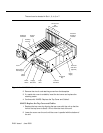
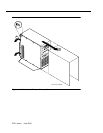
3. Remove the front bezel.
a. Remove the top tape and floppy drive cover, located at the top of
the front panel, if the system has one. Push up from the bottom of
the tape and floppy drive cover, above the power switch, to release
the cover (Figure 2-13, labeled #1).