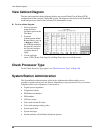
–––––––––––––––––––––––––––––––––––––––––––––––––––––––––––––––––– Directory Number Administration
85
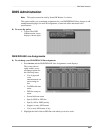
Administration Menu (DKAdmin)
Directory Number Administration
Note This option cannot be used by Strata DK Release 2 or below.
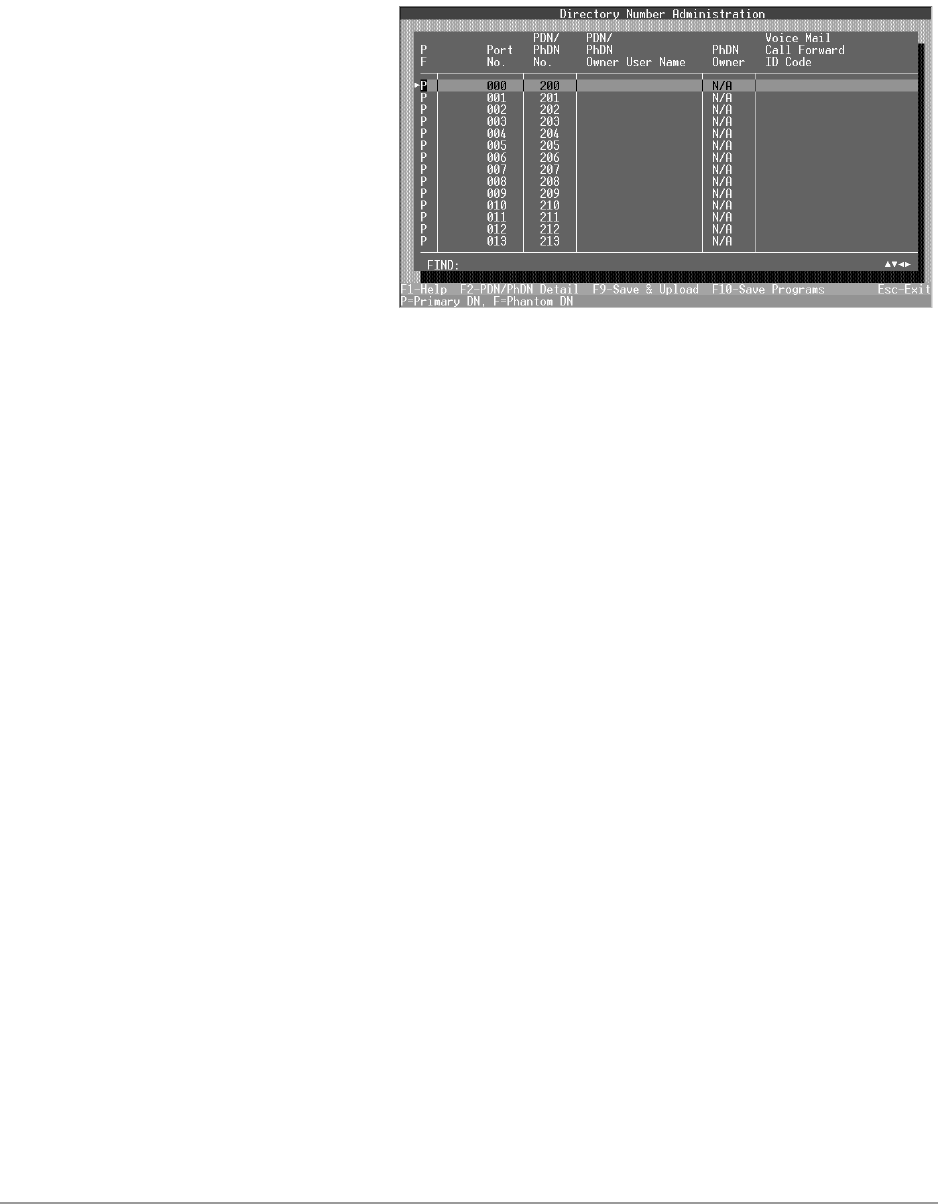
➤ To maintain your directory number assignments for both your PDNs and PhDNs
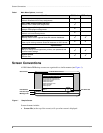
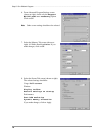
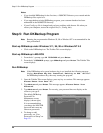
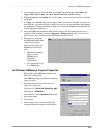
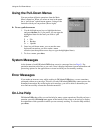
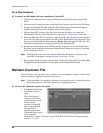
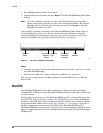
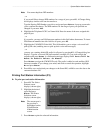
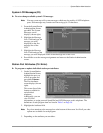
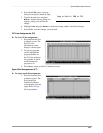
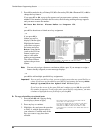
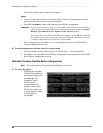
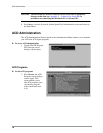
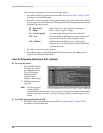
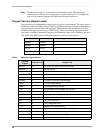
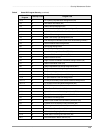
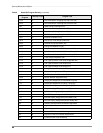
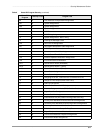
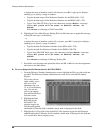
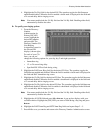
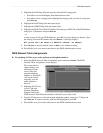
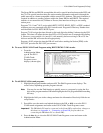
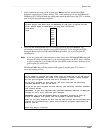
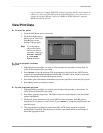
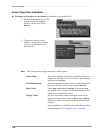
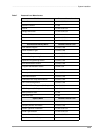
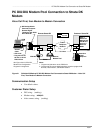
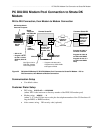
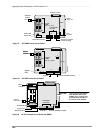
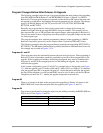
1. Press r and the
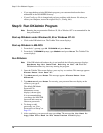
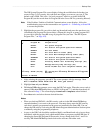
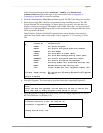
Directory Number
Administration screen
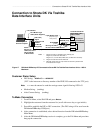
displays (shown right).
This screen enables you
to assign and change
PDN and PhDN user
names, call forward ID
codes and message
waiting ID codes. You
can also assign or edit
DNIS detail features
such as immediate ring,
key numbers and delays.
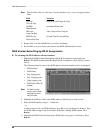
Note The first column on the screen displays a P for a PDN and an F for PhDN.
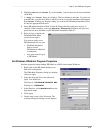
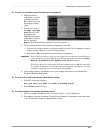
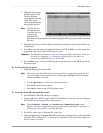
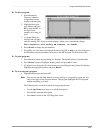
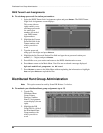
2. Highlight the PDN/PhDN No. field of the desired port number.
Note You can also use the Find feature by moving the highlighter to the Port No. field, and
typing a port number.
3. Type a [PDN] or [PhDN], and press Enter. If there is a DN/Port conflict with the entered
number, an error message displays: Conflict Found in Int./DN Numbering
If this message appears, retype the number and press Enter
...or
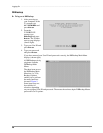
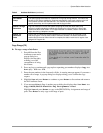
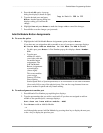
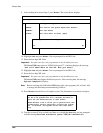
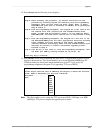
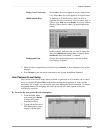
to change the PDN/PhDN numbers for a range of ports, highlight the PDN/PhDN No. field
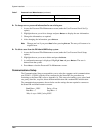
and press F5. A pop-up box displays.
♦ Type the desired starting [DN] number for your PDN ports (000-079) and press
Enter.
♦ Type the desired starting [DN] number for your PhDN ports (500-579) and press
Enter.
♦ A message displays: This operation will modify DN numbers. Go
ahead?
Press Enter to change all the PDNs/PhDNs or press Esc to leave the screen without
making the change.
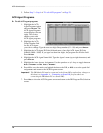
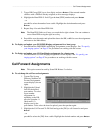
4. Highlight the PDN/PhDN Owner User Name field and enter the name assigned to the
station (up to 16 characters).
5. Highlight the Voice Mail Call Forward ID Code field and type an applicable call forward
ID code (up to 16 characters). Press Enter
...or