


Flexible Button Programming Section –––––––––––––––––––––––––––––––––––––––––––––––––––––––––––––––
64
DKAdmin/DKBackup
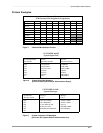
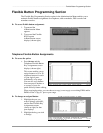
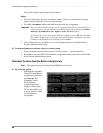
➤ To copy the features from one port to another
1. Highlight the LED you wish to copy and press F4. The Copy to Port dialog box displays.
2. Type the range of port numbers that you wish to copy TO.
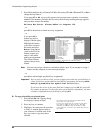
3. Highlight the Button Assignment Column of Add-On Module 1 or 2 for the LED you wish
to change and press F3. A message displays at the top of the screen:
Current template copied from port XXX.
Press Enter to display the Feature pop-up box.
4. Highlight the feature you want to assign to the button and press Enter. A value entry
pop-up box displays.
5. Enter the appropriate number or code for the selected feature. The feature is copied from
this port to the ports specified in Step 2.
6. Repeat Steps 1 ~ 5 for each button you wish to copy.
7. Press F10 to save your changes and return to the Flexible Key Program Administration
screen.
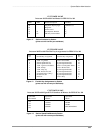
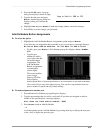
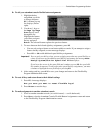
➤ To clear the port
1. To clear the port and return to the default settings for all options, press F5. A message
displays: Are you sure?
2. Press Enter to clear the port.
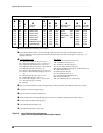
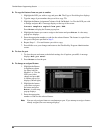
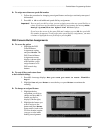
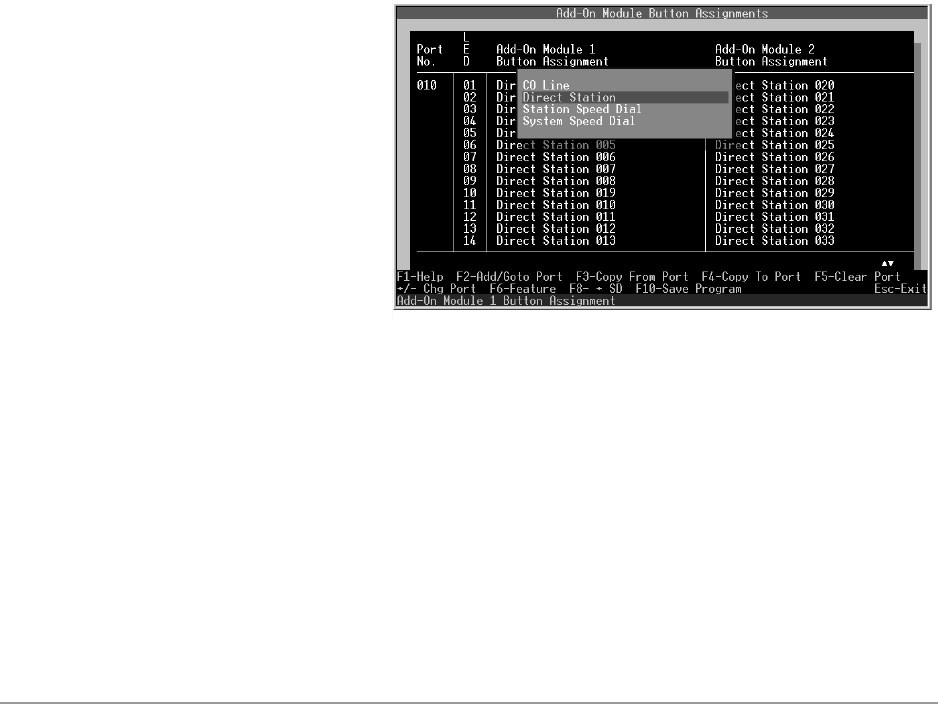
➤ To change an assigned feature
1. Highlight the Button
Assignment column
for either Add-On
Module 1 or 2 for the
LED you wish to
change and press F6.
A feature pop-up list
displays (shown right).
2. Highlight the feature
you want to assign to
the button and press
Enter. A value entry
pop-up displays.
3. Enter the appropriate
number or code for the selected feature.
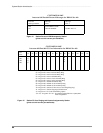
Note You can only assign a feature to one button per port. If you attempt to assign a feature
already assigned, an error message displays.