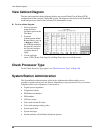
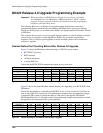
–––––––––––––––––––––––––––––––––––––––––––––––––––––––––––––––––––– System/Station Administration
49
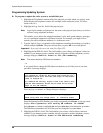
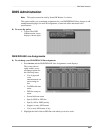
Administration Menu (DKAdmin)
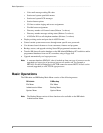
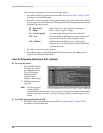
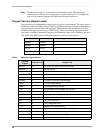
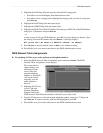
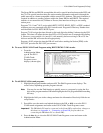
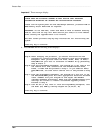
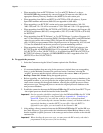
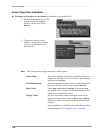
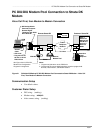
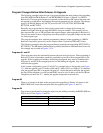
System LCD Messages (F8)
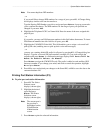
➤ To set or change available system LCD messages
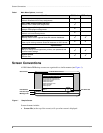
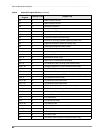
Note You may create up to 40 system messages which may be used by all LCD telephone
ports. Each message may contain two lines using up to 32 characters.
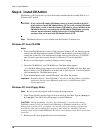
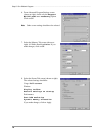
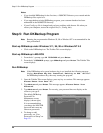
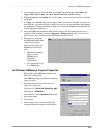
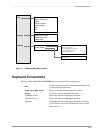
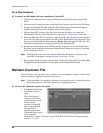
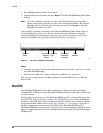
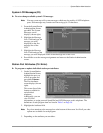
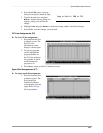
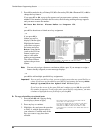
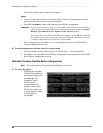
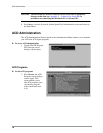
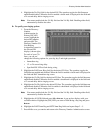
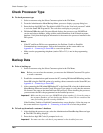
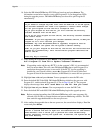
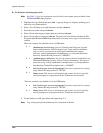
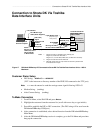
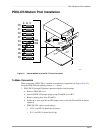
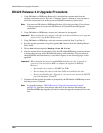
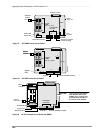
1. From the System/Station
Administration Screen,
press F8. The System
Messages screen
displays (shown right).
2. Highlight the Message
Line 1 field and type the
message you wish
displayed on the first
message line of the
LCD.
3. Highlight the Message
Line 2 field and type the
message you wish displayed on the second message line of the LCD.
4. Press F10 to save the message assignments and return to the Station Administration
screen.
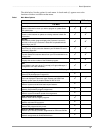
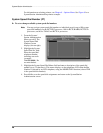
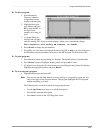
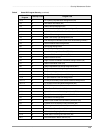
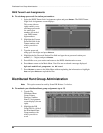
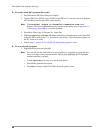
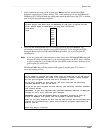
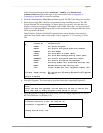
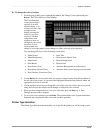
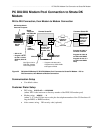
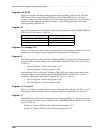
Station Port Attributes (Ctrl Enter)
➤ To program or update individual station port attributes
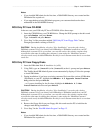
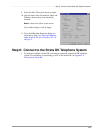
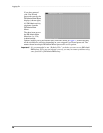
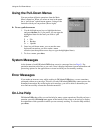
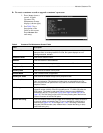
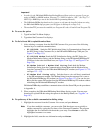
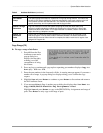
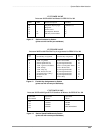
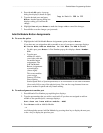
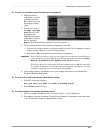
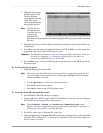
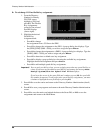
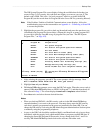
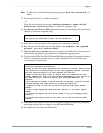
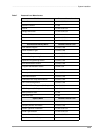
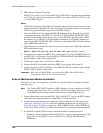
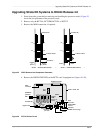
1. On the System/Station
Administration Screen,
highlight the port you
wish to program and
press Ctrl+Enter.
The Port Attributes
screen displays (shown
right).
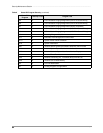
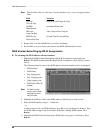
This screen lists all the
features available for
an individual
telephone.
Additionally, you can
view CO Line
information, or assign personal Speed Dial and LCD Messages to this telephone. The
definitions of each program item are listed in Table 3 on Page 50.
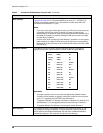
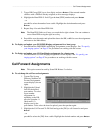
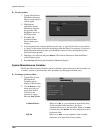
2. Highlight the Attribute field.
Note Pay close attention to the message bar at the bottom of the screen. It will tell you what
options are available for each program.
3. Depending on the attribute you can either: