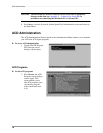
DNIS Administration ––––––––––––––––––––––––––––––––––––––––––––––––––––––––––––––––––––––––––––
90
DKAdmin/DKBackup
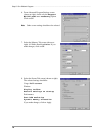
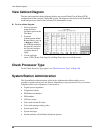
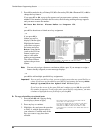
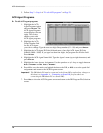
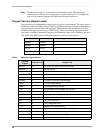
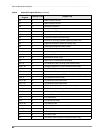
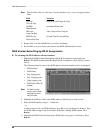
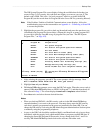
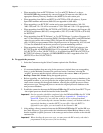
Note Each field has only two selections. Use the spacebar or +/- keys to toggle between
them.
3. Repeat Step 2 for each tie/DID line you wish to set/change.
4. Press F10 to save your entries and return to the DNIS Administration screen.
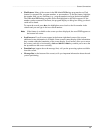
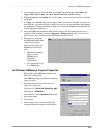
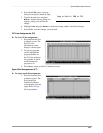
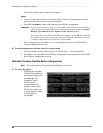
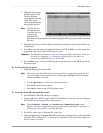
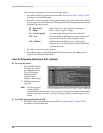
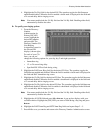
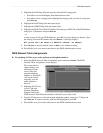
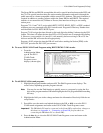
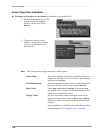
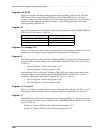
DNIS Number/Name/Ringing/VM-ID Assignments
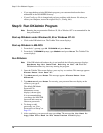
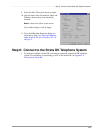
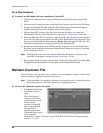
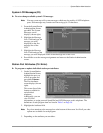
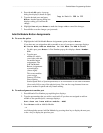
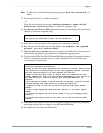
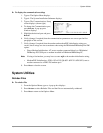
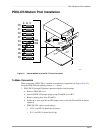
➤ To set/change the DNIS address reference numbers
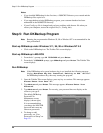
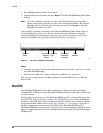
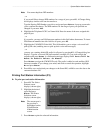
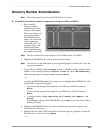
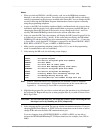
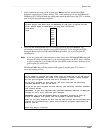
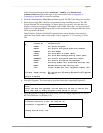
1. Highlight the DNIS Number/Name/Ringing/VM-ID Assignments option and press
Enter. The DNIS Number/Name/Ringing/VM-ID Assignments screen displays (shown
below).
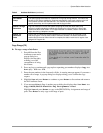
The following items for each of the DNIS address reference numbers can be set/changed:
♦ DNIS number
♦ DNIS name
♦ Day ringing point
♦ Day 2 ringing point
♦ Night ringing point
♦ DNIS Voice Mail ID
number
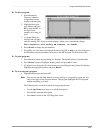
Note To blank out any
entry in these fields,
highlight the field
and press F4.
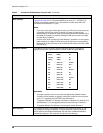
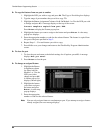
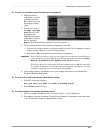
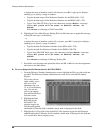
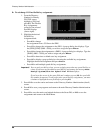
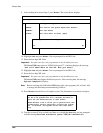
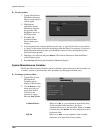
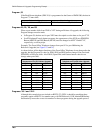
2. Highlight the DNIS No. field of the DNIS address with which you wish to work.
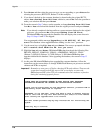
3. Enter the DNIS number, using 2 ~ 5 characters
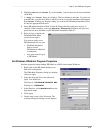
...or
to enter a range for all your DNIS addresses, press F5. A pop-up dialog box displays. Type
the DNIS address range in the From and To fields and a starting DNIS number. Press
Enter.
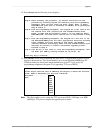
4. Highlight the DNIS Name field and type a DNIS name, using up to 16 characters. Press
Enter.
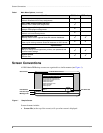
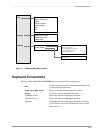
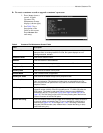
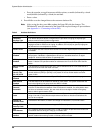
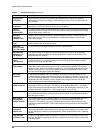
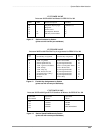
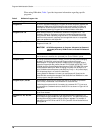
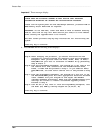
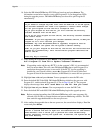
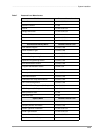
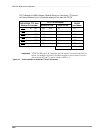
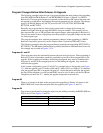
Field
Selection
Tie Line
Voice & P age
Page & Voice/No Page & Voice
Tie/DID
Wind/Immed
Immediate/Wink Start
DID Line
Camp On Busy
Auto Camp-on/No Camp-on
DID/Tie Line
Second Dial Line
Second Tone/No Second Tone