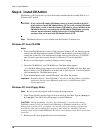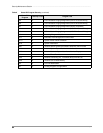
––––––––––––––––––––––––––––––––––––––––––––––––––––––––––––––––––––––– Call Forward Assignments
93
Administration Menu (DKAdmin)
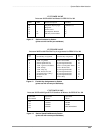
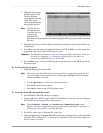
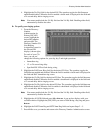
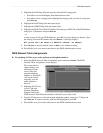
3. Type a DH Group [DN] (up to four digits) and press Enter. If the entered number
conflicts with a DN/Port already assigned, an error message displays.
4. Highlight the Hunt PDN 01 field. Type the hunt [PDN] number and press Enter
...or
press F6 to select the number from a table. Highlight the desired number and press
Enter.
5. Repeat Step 4 for each Hunt PDN field.
Note The Hunt PDN fields scroll once you reach the far right column. You can continue to
access Hunt PDNs using the right arrow key.
6. Press F9 to save the entries and upload the data to the DK, or F10 to save the assignments
and return to the Main Menu.
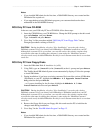
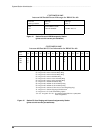
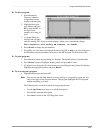
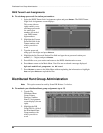
➤ To display and update your DNIS/DID Ringing assignments for a hunt group
➤ Press F2 and the DNIS/DID Line Ringing Assignments screen displays. See “To specify
your ringing options” on Page 87 for procedures on working with this screen.
➤ To display and update your CO Line Ringing assignments for a hunt group
➤ Press F3 and the CO Line Ringing Assignments screen displays. See “To specify your
ringing options” on Page 87 for procedures on working with this screen.
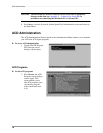
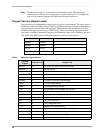
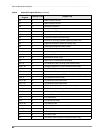
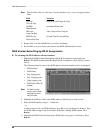
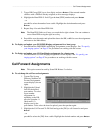
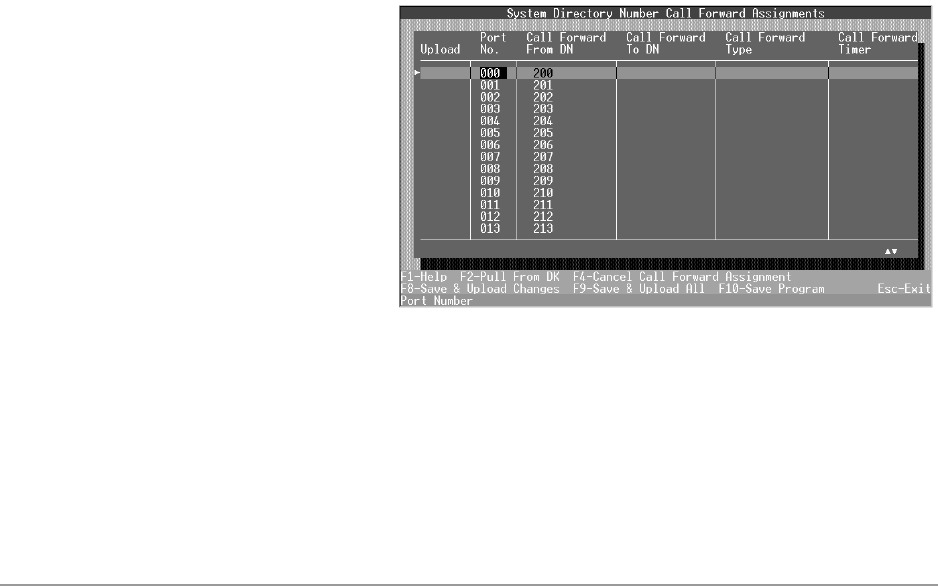
Call Forward Assignments
Note This option cannot be used by Strata DK Release 2 or below.
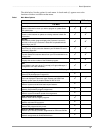
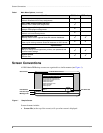
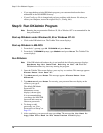
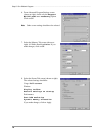
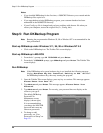
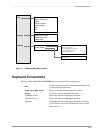
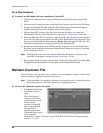
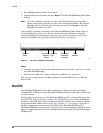
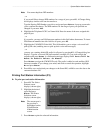
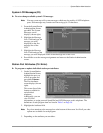
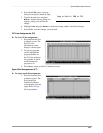
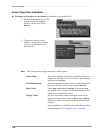
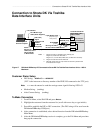
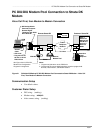
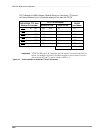
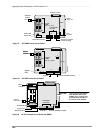
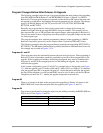
➤ To set/change the call forward assignments
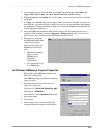
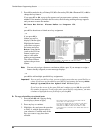
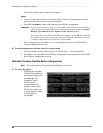
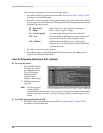
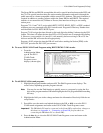
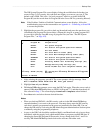
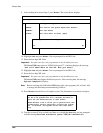
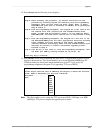
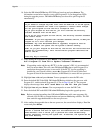
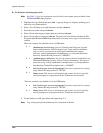
1. Type w. The System
Directory Number Call
Forward Assignments
screen displays (shown
right).
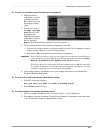
2. Highlight the Upload
field for the desired
port number. To select
a port number
assignment for
uploading to the DK,
press the spacebar. A
check mark (√)
displays next to the
port number. To de-select the item for upload, press the spacebar again.
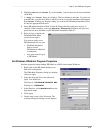
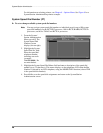
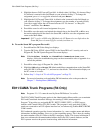
3. Highlight the Call Forward To DN field and type the [DN] to call forward to and press
Enter
...or
press F6 to select the [DN] from a table. Highlight the desired number and press Enter.