


––––––––––––––––––––––––––––––––––––––––––––––––––––– Step 3: (Optional) Make Installation Floppy Disks
19
Installing DKBackup
Step 3: (Optional) Make Installation Floppy Disks
From Windows
If you wish to install DKBackup on a PC that does not have a CD-ROM, you will need to
make installation floppies from a PC that has a CD-ROM. You can make installation disks that
install the program using a Windows application (this works on all PCs with Windows 3.x, 95,
98 or Windows NT) or you can make DOS only installation disks.
CAUTION! Do not use the DOS installation program on a Windows PC.
Note Be sure to exit all programs running in Windows before starting.
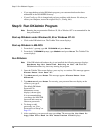
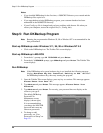
1. Insert the CD-ROM into your CD-ROM drive. The Main Menu appears.
...or if the Main Menu does not appear after you insert the CD-ROM, click Start, Run, then
Browse. Select your CD-ROM drive from the Look in: pull down list. Locate and double-
click mainmenu.exe. The Main Menu opens.
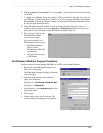
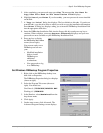
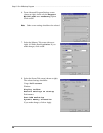
2. From the Main Menu, select “Make Floppy Installation Disks” then select “DKBackup
Windows Installation Disks” or “DKBackup DOS Installation Disks” (depending which
target PC will get the installation). Follow the prompts.
From DOS Only PC
If you wish to install DKBackup on a PC that does not have a CD-ROM, we recommend that
you use a Windows PC and the preceding instructions to make installation floppy disks.
However, in the rare case you are using a DOS only PC that has a CD-ROM, follow these
steps:
1. Place a blank floppy in floppy drive A: (or B:). Insert the CD-ROM into your CD-ROM
drive. Change the DOS prompt to the CD-ROM drive letter and type:
cd\dkbdos\disk1 and press Enter.
2. Type: copy *.* A: (or B:) and press Enter.
3. Place a another floppy in floppy drive A: (or B:) and type: cd\dkbdos\disk2 and
press Enter.
4. Type: copy *.* A: (or B:) and press Enter.