


–––––––––––––––––––––––––––––––––––––––––––––––––––––––––––––––––––––––––––– DNIS Administration
91
Administration Menu (DKAdmin)
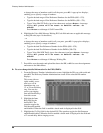
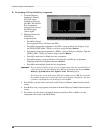
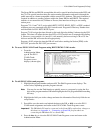
5. Highlight the DAY Ring field and enter the desired DAY ringing point.
♦ Press F2 to review the Ringing Point Identification codes.
♦ Press F6 to select a ringing point. Highlight the ringing point you wish to assign and
press Enter.
6. Highlight the DAY2 Ring field and repeat Step 5.
7. Highlight the NIGHT Ring field and repeat Step 5.
8. Highlight the DNIS Voice Mail ID Number field and type a DNIS Voice Mail ID Number,
using up to 16 characters and press Enter
...or
to enter a range for all your DNIS addresses, press F5. A pop-up dialog box displays. Type
the starting voice mail ID number and press Enter. A message displays:
All ports will be reset to default values. Go ahead?
9. Press Enter to reset the default values or Esc to exit without resetting.
10. Press F10 to save your entries and return to the DNIS Administration screen.
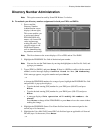
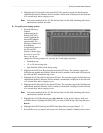
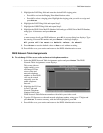
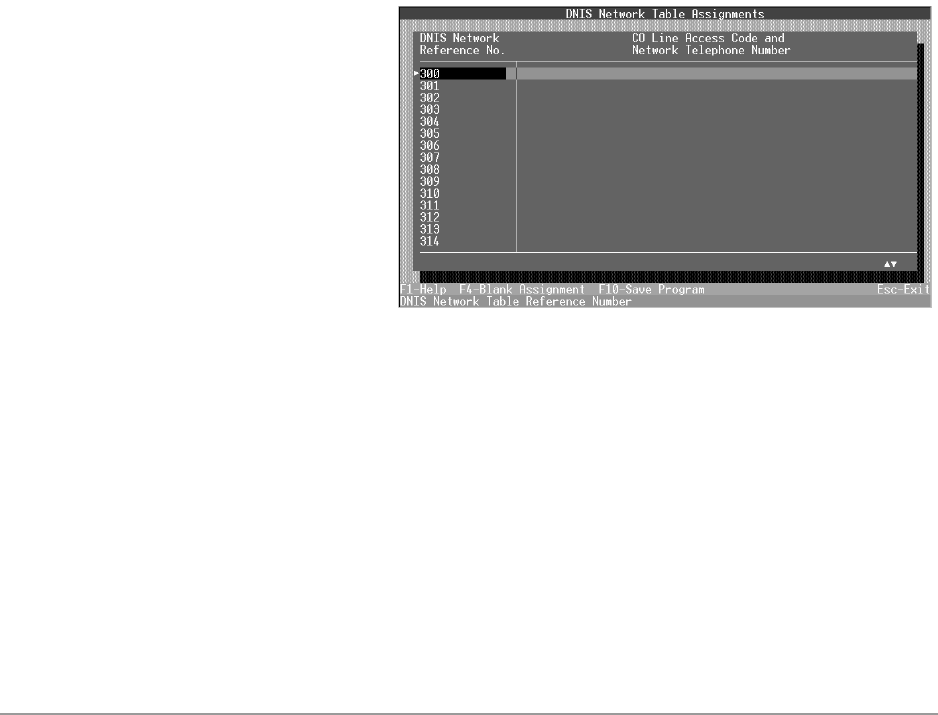
DNIS Network Table Assignments
➤ To set/change CO line access codes and network telephone numbers
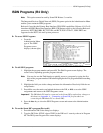
1. Select the DNIS Network Table Assignments option and press Enter. The DNIS
Network Table Assignments screen displays.
This screen (shown
right) enables you to
set/change CO line
access codes and
network telephone
numbers so that DNIS
calls can be routed
externally over the
public telephone
network.
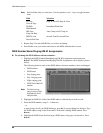
2. Highlight the CO Line
Access Code and
Network Telephone
Number field for the
DNIS Network Table Reference number with which you wish to work.
3. Type the CO line access code and network telephone number, using up to 27 digits and
press Enter. To remove an entry, with the field highlighted, press F4.
4. Press F10 to save your entries and return to the DNIS Administration screen.