


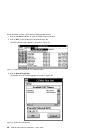
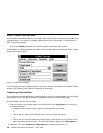


c. Do one of the following:
Click on Update Target Host Screen to set the target agent’s screen to the same screen
you are looking at. Once the target agent has the new screen on their computer, the target
agent can make changes to the data in it. (Depending on how your system administrator
implemented HAT files, the screen set for the target agent may, for example, be the first
application screen or the last one you worked on. In either case, the target agent can
resume working with the caller’s data after the transfer.)
Click on Send Host Screen Image to send a read-only image of your screen to the target
agent. In this type of transfer, the target agent can only view the data transmitted by you.
Note: You cannot enter a comment in the Comment for Target Agent box if you select
the Send Host Screen Image option.
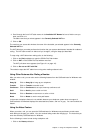
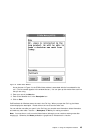
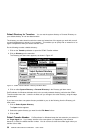
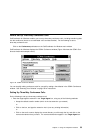
d. Do the following to select the host session:
1) Click on Defaults on the CCWin Transfer window menu bar.
The Defaults pull-down menu appears.
2) Click on Host Session on the Defaults pull-down menu.
The Host Session box appears.
3) Select the session by scrolling through the list and clicking on the session you want.
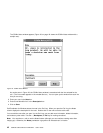
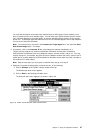
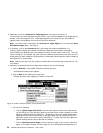
e. If you are only sending data, click on the Send Data Only pushbutton. The transfer is complete
at this point. Skip the next step.
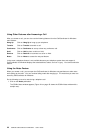
Note: If you are sending data only, CallCoordinator for Windows displays a message box to the
other agent asking the following question:
Data received from extension nnnn
.
Do you wish to accept the data?
The target agent can decline the request, in which case the data is discarded. This message is
useful in situations where the target agent already has data on the screen.
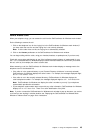
5. Click on the Transfer pushbutton to transfer the call or both the call and data.
Note: If you are including data with the call transfer, the data is sent immediately when you click on
Transfer.
This step connects you to the target agent, and the caller is placed on Hold. CallCoordinator for
Windows displays the message Call on Hold.
You can consult with the agent before completing the transfer. If the target agent is busy with
another call, reconnect yourself with the caller by clicking on Cancel. (This option may not be avail-
able on your telephone system switch. You may have to use your telephone to manually reconnect
yourself to the caller.)
6. Click on the Complete pushbutton to complete the call transfer.
Note: If you are transferring to an ACD group, click on the Complete pushbutton immediately to
complete the transfer (that is, right after clicking on Transfer).
48 CallPath CallCoordinator for Windows: User’s Guide