


© 2006 Verizon
Verizon One User Guide
20
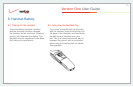
7.3 Wall Mounting on a Hollow Drywall
Surface (Optional)
(cont’d)
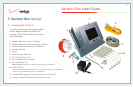
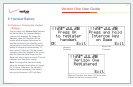
6. Connect the DC 12V power supply
cord to the power connector marked
12V DC on the rear panel of the
Verizon One Base Unit. Plug the
other end of the power supply into an
AC wall socket, and then turn on the
power switch (if it is not already on).
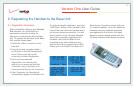
7. Check the Base to see if the Power
LED is solid green. If the Power LED
is solid green, the Verizon One
Base is powered up.
8. Verify telephone operation by
pressing the <Speakerphone>
button found on the front of the Base
Unit. Once pressed, the In-Use LED
should be solid blue and a dial tone
should be heard from the speaker.
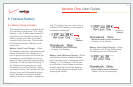
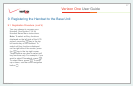
9. Once telephone operation has
been verified, snap the Base Unit
Swivel stand onto the base. Adjust
the stand by pressing the paddle
and tilting the base until the top of
the Base Unit touches the edge of
the circular stand. The Base Unit
must be installed in this position.
Prior to placing the Base Unit and
Swivel Stand onto the wall, use the
cable management grooves within
the bottom of the stand to guide the
Power and telephone cables, so that
the stand can sit flush with the wall.
Mount the unit to the wall.
10. Once the unit has been mounted to
the wall, re-verify telephone
operation by pressing the
<Speakerphone> button on the front
of the Base unit. Once pressed, the
In-Use LED should be solid blue and
a dial tone should be heard from the
speaker.
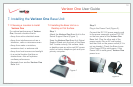
7. Installing the Verizon One Base Unit