


3-23
Cisco BTS 10200 Softswitch Operations and Maintenance Guide, Release 6.0.x
OL-16000-07
Chapter 3 Monitoring and Backing Up the BTS
Exporting Provisioned Data
# su - oracle
$ cd /opt/orahome/.ssh
$ sftp root@priems
sftp> cd /opt/orahome/.ssh
sftp> get id_rsa*
sftp> quit
$ ls -l /opt/orahome/.ssh/id_rsa*
-rw-------1 oracleorainst1675 Mar 10 15:42 id_rsa
-rw-r--r--1 oracleorainst397 Mar 10 15:42 id_rsa.pub
Now both primary and secondary EMSs have the same "id_rsa" and "id_rsa.pub" files in
/opt/orahome/.ssh directory.
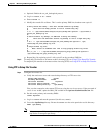
Step 4 Create an oracle user and /opt/backup directory on the remote SFTP server.
a. Login to remote SFTP server as root.
b. Create a user "oracle" with group "orainst" and home directory "/opt/orahome".
c. Create a repository directory "/opt/backup".
# mkdir -p /opt/orahome
# groupadd orainst
# useradd -g orainst -d /opt/orahome -s /bin/ksh oracle
# chown oracle:orainst /opt/orahome
# passwd oracle
New Password: <Enter password>
Re-enter new Password: <Re-enter password>
# mkdir -p /opt/backup
# chown oracle:orainst /opt/backup
# su - oracle
$ mkdir -p /opt/orahome/.ssh
$ chmod 700 /opt/orahome/.ssh
$ chown oracle:orainst /opt/orahome/.ssh
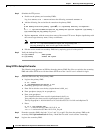
Step 5 Sftp the "id_rsa" and "id_rsa.pub" files generated in Step 1 to remote SFTP server /opt/orahome/.ssh
directory. Make the file owned by "oracle:orainst" owner and group.
Login to remote SFTP server:
# su - oracle
$ cd .ssh
$ sftp root@priems
sftp> cd /opt/orahome/.ssh
sftp> get id_rsa*
sftp> quit
$ cat id_rsa.pub >> authorized_keys
$ chmod 600 id_rsa* authorized_keys
$ ls -l
-rw-------1 oraoragrp788 Mar 10 16:52 authorized_keys
-rw-------1 oraoragrp1675 Mar 10 16:48 id_rsa