


108 - 165 IP Telephony v1.0 Lab 5.1.8 Copyright © 2005, Cisco Systems, Inc.
l. The sequence number for this phone will be used in a future step. What sequence number was
selected? _________________
m. Click on the Add button. When prompted if the changes are to be saved, click on OK. A
confirmation message appears. Click OK. When prompted if the next extension is to be added to
a new phone, click OK. When the No new phone to add or no sequence number message
appears, click OK.
n. The sequence number is what creates the ephone-dn (directory number). From a command
prompt, look at the router configuration and see how there are two new ephone-dn entries. Each
new entry has a number using the sequence number. From the web interface, click on the
Configuration menu option and select Phones. Select one of the IP phone MAC addresses for
one that is being used. Click on a button number. If a checkmark is beside one of the sequence
numbers, click on the checkbox to remove the checkmark. Click in the checkbox beside one of
the new sequence numbers.
o. What sequence number was chosen in the previous step? ____________
p. Click on the Save link located at the top of the page. Click on the Change button located at the
bottom of the page. When prompted if the changes are to be saved, click on the OK button. A
confirmation message appears; click on OK.
q. Select the other IP phone MAC address that is being used. Click on a button number. If a
checkmark is beside one of the sequence numbers, click on the checkbox to remove the
checkmark. Click in the checkbox beside one of the other new sequence number (the one NOT
used in the previous step).
r. Click on the Save link located at the top of the page. Click on the Change button located at the
bottom of the page. When prompted if the changes are to be saved, click on the OK button. A
confirmation message appears; click on OK.
s. Verify that the intercom connects in both directions on the IP phones. If the Dialable Intercom
does not work in both directions, troubleshoot as necessary.
t. Using the analog phone dial both XXX0 and XXXX (where X is the pod number). Note the
intercom works even through an analog phone connection.
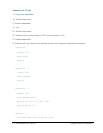
u. From privileged exec mode, use the command show running-config | begin tele command to
view the changes.
CMERouterX# show running-config |begin tele
v. What settings changed under the ephone-dn and ephone sections?
_____________________________________________________________________________
_____________________________________________________________________________
_____________________________________________________________________________
_____________________________________________________________________________
_____________________________________________________________________________
_____________________________________________________________________________