


103 - 165 IP Telephony v1.0 Lab 5.1.7 Copyright © 2005, Cisco Systems, Inc.
Step 1 Configure the Intercom
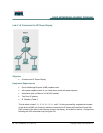
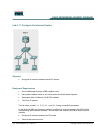
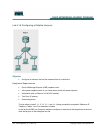
a. Ensure the two IP phones can connect to one another before this lab begins. Troubleshoot as
necessary.
b. Access the CME router using the Web-based GUI configuration method. Login as the system
administrator (username ACMEadmin password cisco). Point to the Configure menu option
and select the Extensions option.
c. Click on the Add link. In the Extension Number: textbox, type D3333. Select a Sequence
number from the drop-down box. This number will be the ephone-dn (directory number) shown in
the router configuration. The sequence number must be unique.
d. What sequence number was selected for the D3333 extension? _________________________
This number will be used later in the configuration.
e. In the Extension Type drop-down menu, select Intercom. Type Intercom for the name of the
Intercom in the Name: textbox. In the first Label: textbox, type Intercom. In the Intercom
Number: textbox, type D4444.
f. Click on the Add button to add this extension. When prompted to save the changes, click on the
OK button. A message appears that the extension was added; click OK. When prompted to add
the new extension to the new phone, click on the OK button. When the message appears that
there is no new phone to add or that there is no free sequence number, click OK.
g. Add a second new extension using the same method. Set the extension number to D4444 with a
unique sequence number, an extension type of Intercom, a name of Intercom, a label of
Intercom, an intercom number of D3333, and all other settings left at default. Save these
changes.
h. What sequence number was chosen for the D444 extension? ___________________________
This number will be used in the next part of the configuration.
i. Point to the Configure menu option and select the Phones option. Click on the MAC address of
the first IP phone. The MAC address is located in the Phone Physical ID column.
j. Go to the Speed Dial Information section and delete any speed dials located there. This is done
in case the phone has only two buttons. Even if the phone has multiple buttons, future labs are
not affected.
k. In the Phone Line Buttons section, select an unused button by clicking on the button number link
located in the Button column.
l. Locate the D3333 Intercom option and click in the checkbox beside the sequence number.
m. Click on the Save link at the top of the window. Click on the Change button at the bottom of the
window. Respond to the next two messages by clicking on OK. The IP phone should reboot.
n. What indication does the first IP phone give that this configuration was made successfully?
____________________________________________________________________
o. Select the MAC address of the second IP phone. Delete any speed dials. Select a free phone
line button number link. Locate the D4444 Intercom option and click in the checkbox beside the
sequence number. Click on the Save link at the top of the window. Click on the Change button.
Respond to the next two messages by clicking on OK. The IP phone should reboot.