


14
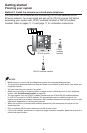
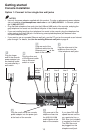
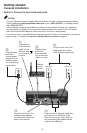
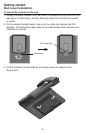
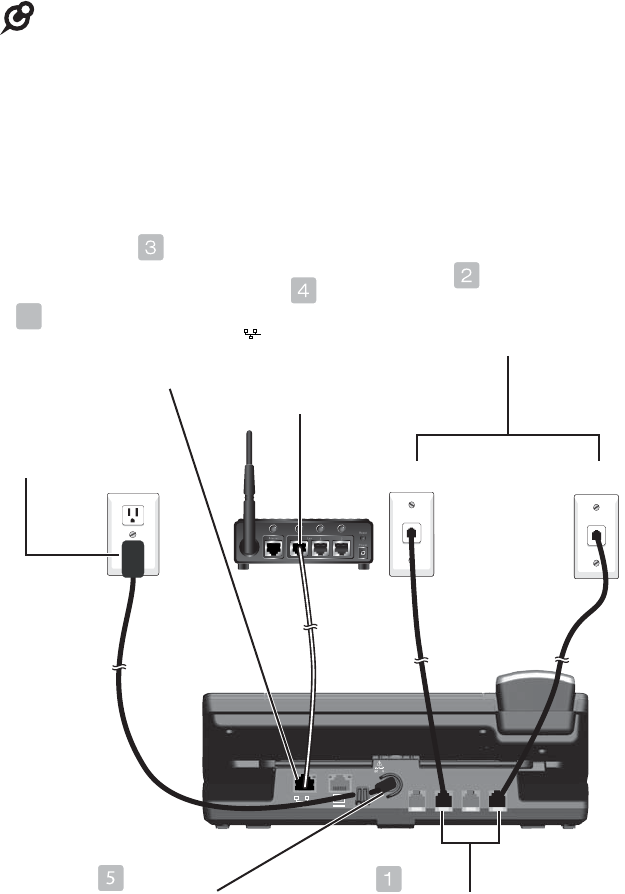
Option 2: Connect to two 2-line wall jacks
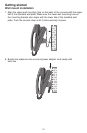
Getting started
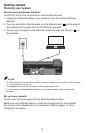
Console installation
Use only
Supplied
Adapter
L4 L3/4 L2 L1/2
5.1
Router
Line 3/4 Line 1/2
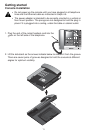
Plug the larger
end of the
console power
adapter into an
electrical outlet
not controlled by
a wall switch.
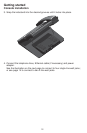
Plug one end
of the Ethernet
cable into the
Ethernet port (
)
at the back of the
console.
Plug the other end of the
telephone lines into the
2-line telephone wall jacks.
Plug the other
end of the
Ethernet cable
into an Ethernet
switch or router.
Plug one end of the black telephone
line cord into the L1/2 jack at the
back of the console. Then, plug one
end of another black telephone line
cord into the L3/4 jack.
Plug the small end of the
console power adapter
into the power jack at the
back of the console.
Ethernet
switch/
Router
6
Line 1/2Line 3/4
NOTES:
Use only the power adapter supplied with this product. To order a replacement power adapter,
visit our website at businessphones.vtech.com or call 1 (800) 595-9511. In Canada, please
dial 1 (800) 267-7377.
A 2-line wall jack supports two telephone numbers in one wall jack. Contact your telephone
service provider for details. You must plug the black telephone line cords into the 2-line wall
jacks and the L1/2 and L3/4 jacks of the console for the lines to work properly.
If you want to use an occupied Ethernet wall jack, use the PC port on the console as an Internet
pass-through. For details, see Use the existing Ethernet wall jack on page 8 .
•
•
•