3. If you are asked to remove the existing application, click OK.
4. If you are asked permission to continue the installation, click Continue.
5. Click Next. The License Agreement window opens.
6. Select the button to agree with the terms of the license agreement.
7. Click Next. The User Settings window opens.
8. Enter the address of the NuPoint Unified Messaging platform, and click Next. The Choose
Destination Location window opens.
9. Click Next to accept the default setting for the installation location or click Change to place
the files in another location. After you have specified the location, the Start Copying Files
window opens.
10. Click Next. The software installs, and then the InstallShield Wizard Complete window
opens.
11. Click Finish.
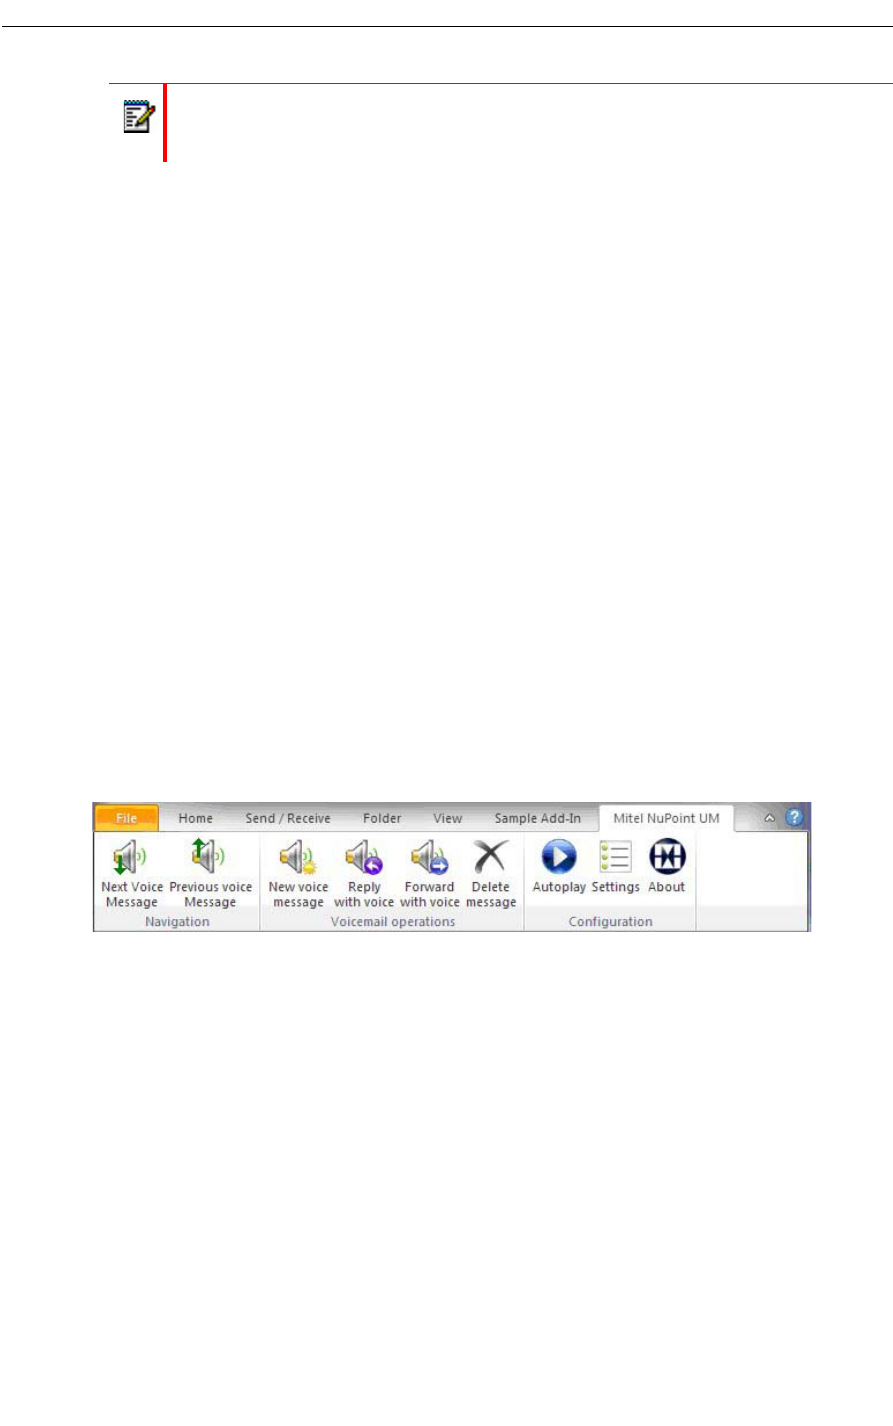
12. Open Microsoft Outlook, and confirm that the Mitel NuPoint UM tab appears in the Ribbon.
NuPoint Unified Messaging Tab
Once the Mitel Outlook Client Plug-in has been installed, the Unified Messaging tab appears
in the Ribbon located in the upper portion of Microsoft Outlook 2010.
Figure 5: Mitel NuPoint UM tab in Outlook 2010 Ribbon
The following buttons are available on the Mitel NuPoint UM tab:
• Next Voice Message: Locates the NuPoint UM message that appears after the currently
selected NuPoint UM message.
• Previous Voice Message: Locates the NuPoint UM message that appears before the
currently selected NuPoint UM message.
• New Voice Message: Create a new voice message and send it to one or more NuPoint
users.
• Reply with Voice: Sends a reply to the sender of a NuPoint UM message with a voice
message.
• Forward with Voice: Forwards a NuPoint UM message to another user with a voice
message.
Note: The OutlookClientPlugin.exe file can be installed from either Mitel OnLine
or the Downloads tab in the Web View interface. If this tab is unavailable, see your
system administrator in order to have the OCP download enabled on your mailbox.


